Tuesday, April 20, 2010

Quick Tip: Simulating Chains using Reactor in 3ds Max

Final Product What You'll Be Creating

Adobe Design Premium CS5 software offers you complete creative freedom without sacrificing precision or quality, whether working in print, web, interactive, or mobile media.

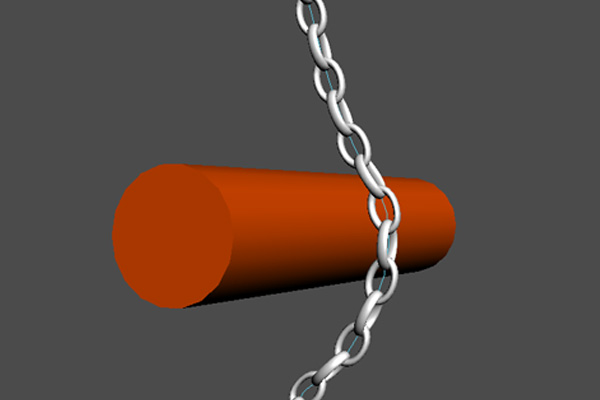
In this short tutorial, you will learn how to simulate chains, necklaces, or pearls using an easy and very efficient method with reactor in 3ds Max. After watching this, you will be able to simulate chains in just a few short seconds, a skill which can prove to be very useful in countless different situations.

Step 1

To make things easier, I have already created a chain and a deflector cylinder for you, so now let’s just see how to do the simulation. Open “Chain.max” if you are working with 3ds Max 2010, if not, import “Chain.obj” into your scene.

Step 2

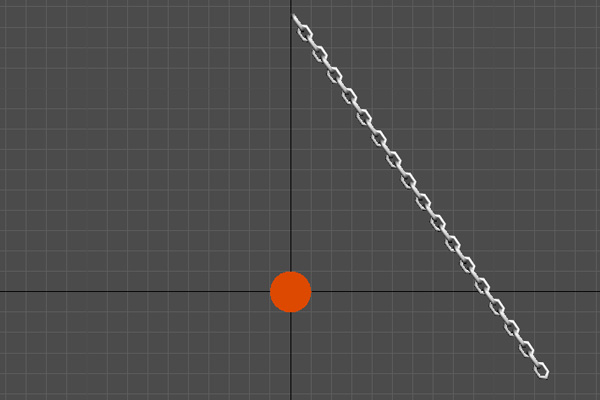
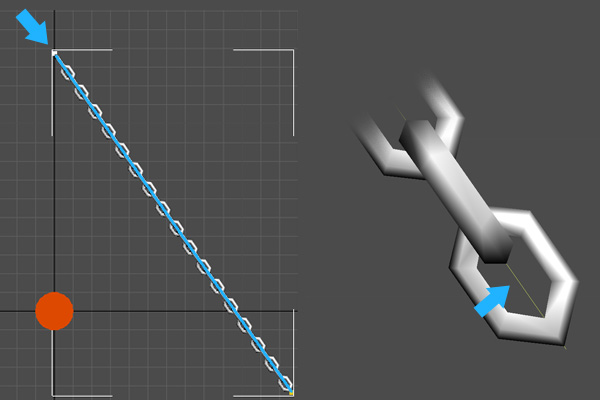
In the “Front” viewport, create a “Line” along the chain. This “Line” will be the object that you actually simulate, while the chain is driven by it using a “Skin” modifier.

Step 3

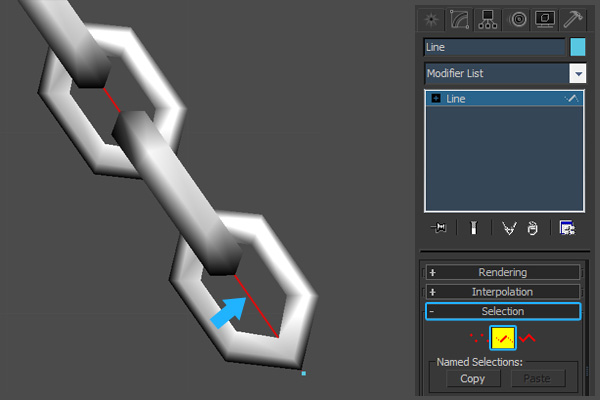
Select the “Line”. In the “Modify” panel, “Selection” rollout, click the “Segment” button, and select the existent segment of this spline. This segment needs to be subdivided to be able to simulate the “Line” with reactor.

Step 4

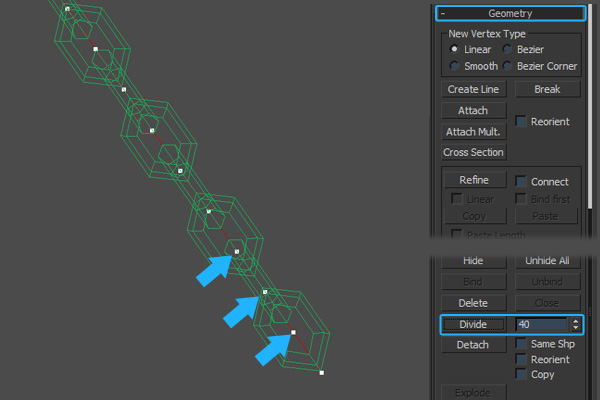
In the “Geometry” rollout, set the “Divisions” spinner to ‘40′, and click the “Divide” button. This operation subdivides the selected segment by adding the number of vertices specified by the spinner…in this case ‘40′.

Step 5

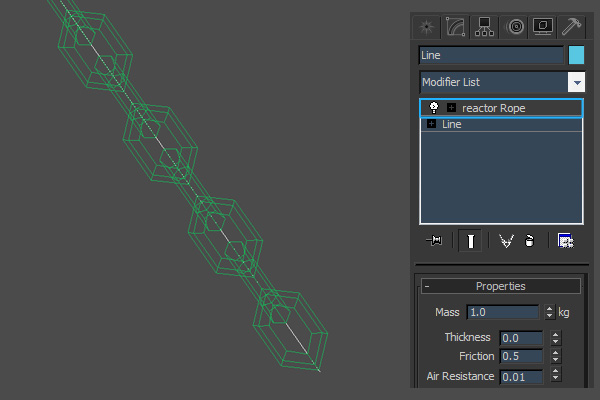
In the “Modify” panel, add a “reactor Rope” modifier.

Step 6

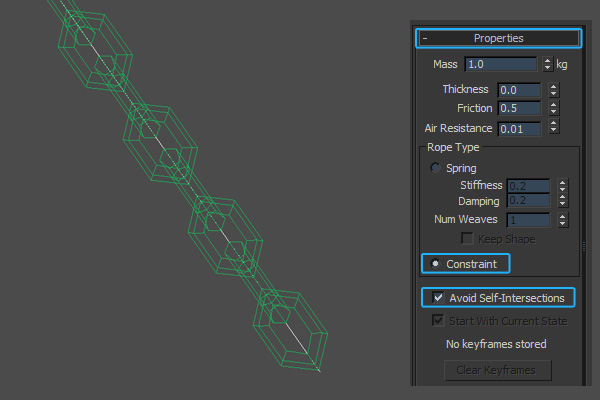
In the “Properties” rollout, change the “Rope type” to “Constraint”, because you don’t need flexibility, and enable “Avoid Self-Intersections”.

Step 7

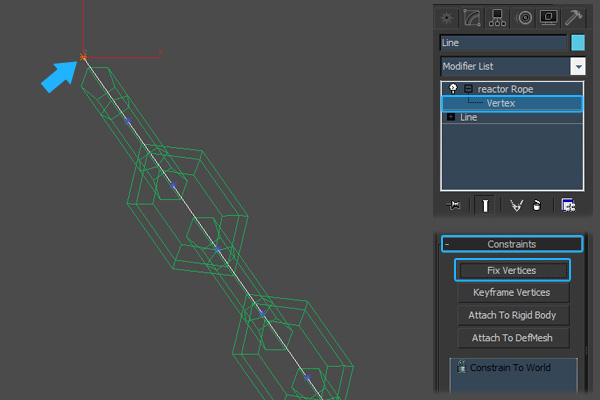
Select the vertex from the top, and in the “Constraints” rollout, click the “Fix vertices” button.

Step 8

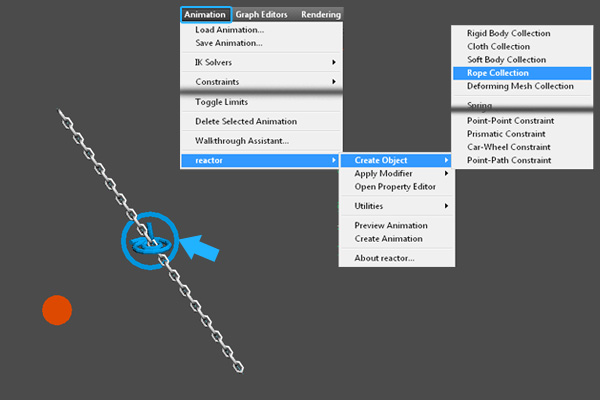
Now, you need to include these objects into “reactor Collections”, to be able to simulate them with reactor. With the “Line” selected, go to “Animation > reactor > Create Object > Rope Collection”. Now the spline is included in the newly created “Rope Collection”.

Step 9

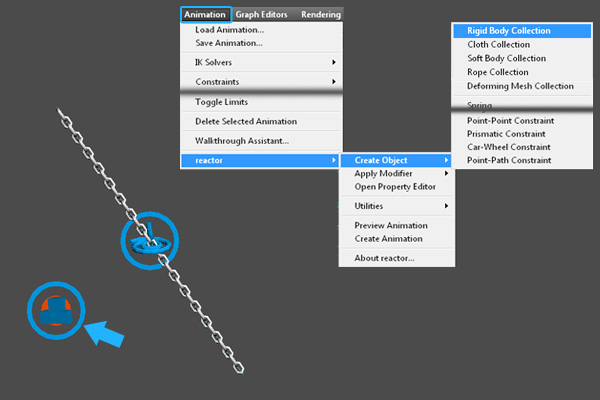
Select the “Cylinder”, and add it to a “Rigid Body Collection”.

Step 10

Go to “Animation > reactor > Create Animation”, to create the animation of this rope. You can also watch the simulation in real-time, by selecting “Preview Animation”.

Step 11

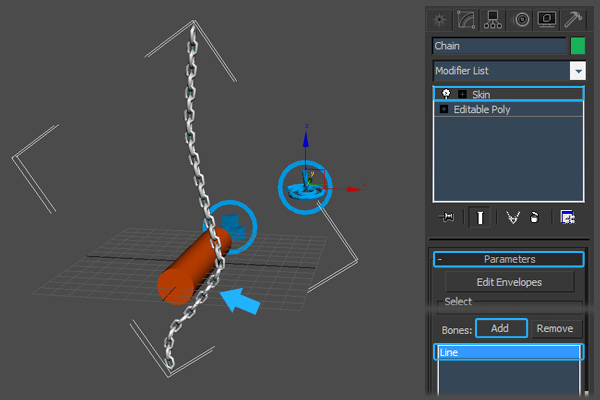
After a few seconds the simulation is done, and the “Line” acts like a rope. Go to Frame 0, select the Chain and add a “Skin” modifier to it. In the “Bones” section, click the “Add” button and select the “Line”.

Step 12

Play the animation. Now the chain is animated, and driven by the “Line”.

Create a Logo Dispersion Effect using Particle Flow and After Effects

Final Product What You'll Be Creating

As you may know, when you get a grasp on particles in CG, the possibilities of what you can accomplish are nearly limitless. In this 3ds Max based Particle Flow tutorial, you will learn an easy method of dispersing a logo into particles using materials.

STEP 1

First of all launch 3ds Max. Now go to “Create > Shapes > Text”, and in the text field type “CG TUTS”. Apply the “Extrude” modifier to it to give it some depth.

STEP 2

Now go to “Create > Space Warp > Forces > Wind”. This will create a “Wind” icon in the view port. Put it on the left side of the text in the view port.

Step 3

In the same way create a “Drag” and put it beside the “Wind” in the view port.

Step 4

Now it’s time to tweak the values of these space warps in the view port. Select the “Wind”, and in the parameter rollout, set the “Strength” to 0.5, the “Turbulence” to 0.88 , the “Frequency” to 1, and the “Scale” to 0.02.

Step 5

For the “Drag”, sin the Parameters rollout, under the “Damping Characteristics” group, set the X-axis to 15.0, the Y-axis to 13.0, and the Z-axis to 15.0.

Step 6

Now make some random shapes with the help of the Line tool (as shown). Note: The final effect will depend on you how do you make these in random shapes. Select them all and make a Group.

Step 7

Now go to “Create > Particle System > PF source” and drag it in any of the viewports.

Step 8

Select the “PF Source” icon in the viewport, and in the “Setup” rollout, click on the “Particle View” button, or hit 6 on your keyboard.

Step 9

Now your Particle View window is displayed. Create a Standard Flow and delete the Position Icon, Speed, and Shape from it, since you won’t need them for this task.

Step 10

Drag a “Position” object into the event, and under the “Emitter Objects” window, add the text “CG TUTS”. Select “Grayscale” in “Density By Material”, turn on “Use Sub-Material”, and set Material ID box to 2.

Step 11

In the same manner, add a “Shape Instance” and “Force” to the event as well.

Step 12

Select the group of line shapes for the “Shape Instance” and for the “Force”, add a “Wind” and “Drag” in the “Force Space Warp” window.

Step 13

Now open the material editor, and in an empty slot assign a multi/sub object and
set the number of materials to 2. Now click on the sub material 1 and in the Diffuse channel, select any color (in this case white).

Step 14

Put a Gradient Ramp in its Opacity channel. Animate the black ramp, in linear from left to right. Do it in such a way that it must overcast the white untill the 80th frame. Give it a bit of Noise also to have a better look.

Step 15

Now go to the other sub material 2, and put a Gradient Ramp in its Diffuse. Animate the ramp in linear from left to right in such a way that a strip of black color must travel through the white until the 80th frame. Also make it invert in the “Output” panel.

Step 16

Copy the Gradient Ramp of the opacity from id 1 and paste it in the opacity of the id 2.

Step 17

Apply this whole Multi/sub object to the text in the view port.

Step 18

Assign a “Material Static” operator in the event, and drag a white material slot to the “Assign Material” button.

Step 19

Press “F9” to render and you will see a beautiful scene of the text “CG TUTS” turning into broken random shaped particles.

Step 20

Press “F10” to open the render setup window, and set the render frames from 0 to 143, and the output size as HDTV(1280/720).

Step 21

Set the file format as TGA with 32 bits per pixel (which will give it transparency), and then render the scene in an image sequence.

Step 22

If you have After Effects, you can use it for some post work, like adding shine from the back side. For this I imported the image sequence into After Effects. If you are not familiar with the After Effects interface, kindly visit www.vfxrider.com, or AEtuts.

Step 23

Make a duplicate of the “cgtuts” layer by selecting it and pressing “Ctrl+D”, or by going to “Edit > Duplicate”.

Step 24

Select the layer which is behind the first one, and apply “Effects > Sapphire Lighting > S_Rays”. You can get the Genarts Sapphire plugin from www.genarts.com. Play with the values of rays length and the color. You can use the Trapcode Shine plugin for this kind of look as well.

Step 25

Now if you hit the play button, you will have a beautiful logo dispersion scene!

Thursday, April 8, 2010

61 Mesmerizing VFX Breakdowns

Nokta

Mnet Urban Bubbles

Color Grading Breakdown Rebel T1i

Making College Humor’s “Die Hardly Working”

Making of Lynx – Billions

Brian Alvarez 2010 Reel

PUMA ‘Until Then’

Ratatouille Progression Reel

Commercial Side by Side with Antics Pre-Viz

Waldemar Bartkowiak 2008 3D Demo Reel

Nuke Breakdowns

EntityFX Additional Shots and Breakdowns

Furious VFX Demo Reel

Making of the Toughbook Super Bowl Commercial

Making of The Pacific on FXGuide

Visual Effects of Pan’s Labyrinth

ESPN/NASCAR “Dominoes (Making Of)”

VIV Mag Featurette: A Digital Magazine Motion Cover and Feature for the iPad

Motion Adrenaline

Weta Digital’s Avatar VFX Breakdowns

Weta Digital’s The Lovely Bones VFX Breakdowns

Making of Snickers – Rugby

Making of Snickers – Tag

Making of Snickers – Gliders and Robosoc

Making of Nuit Blanche

BaseFX Photoreal 3D Wolves Hair and Fur Workflow

BaseFX 3D Snow and Roto Breakdown

Lost Season 6 Promo Chronicle of a Hit

The Making of “Marching Through Your Head”

GhostVFX Volvens Forbandelse VFX Before/After

GhostVFX Ben 10 VFX Before/After

GhostVFX Ninja Assassin VFX Before/After

GhostVFX Drag Me To Hell VFX Before/After

The MIll’s Making of Wrigley’s 5 Gum Spots

Alice in Wonderland VFX Breakdown

Making of Motion Theory’s Data Baby

Making of Citroen C4

The Third & Seventh Compositing Breakdown

Making of Ford Focus

Google Chrome Behind the Scenes

Making of White Swan

Sony – Make.Believe

Pictorion Hilde VFX Shot Breakdowns

Pictorion Adam Resurrected VFX Shot Breakdowns

Pictorian The Children of Huang Shi VFX Shot Breakdown

Pictorion Palermo Shooting VFX Shot Breakdown

AutoTopsy – VFX | Before & After

23 Minute Feature on Making of Avatar

Making Of 2010 Census “Community”

Behind the Scenes of Sony’s – Eye Candy

BarclayCard Rollercoaster Behind the Scenes

Behind the Scenes: Percy Jackson and the Lightning Thief

Making of Guinness Evolution

Platige Image – Katyn VFX Breakdown

Platige Image – Antichrist VFX Breakdown

The Aviator VFX and Behind the Scenes

Platige Image – Cyfra+ Sport HD Breakdowns

Platige Image – Kujawski “Harvester” Breakdowns

“Transformers 2: Revenge of the Fallen” Sound for Film Profile

Making of Blackhole

If you enjoyed this post, please give it a vote on Digg or a stumble to say thanks!