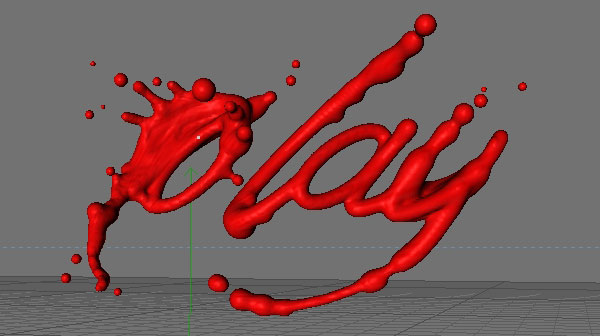
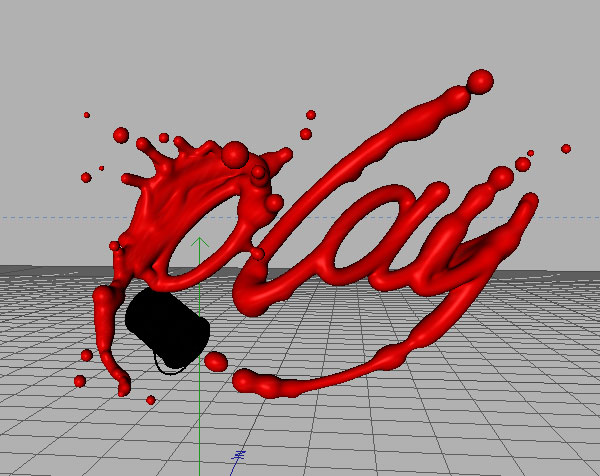
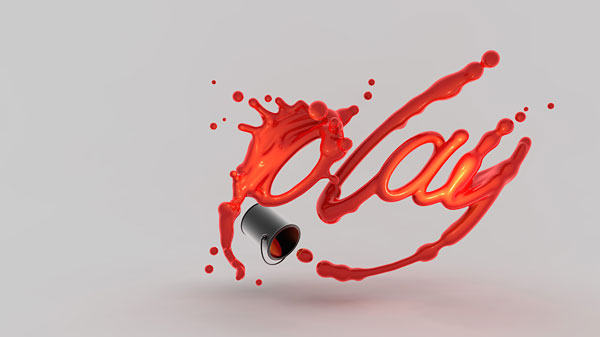
Final Product What You'll Be Creating
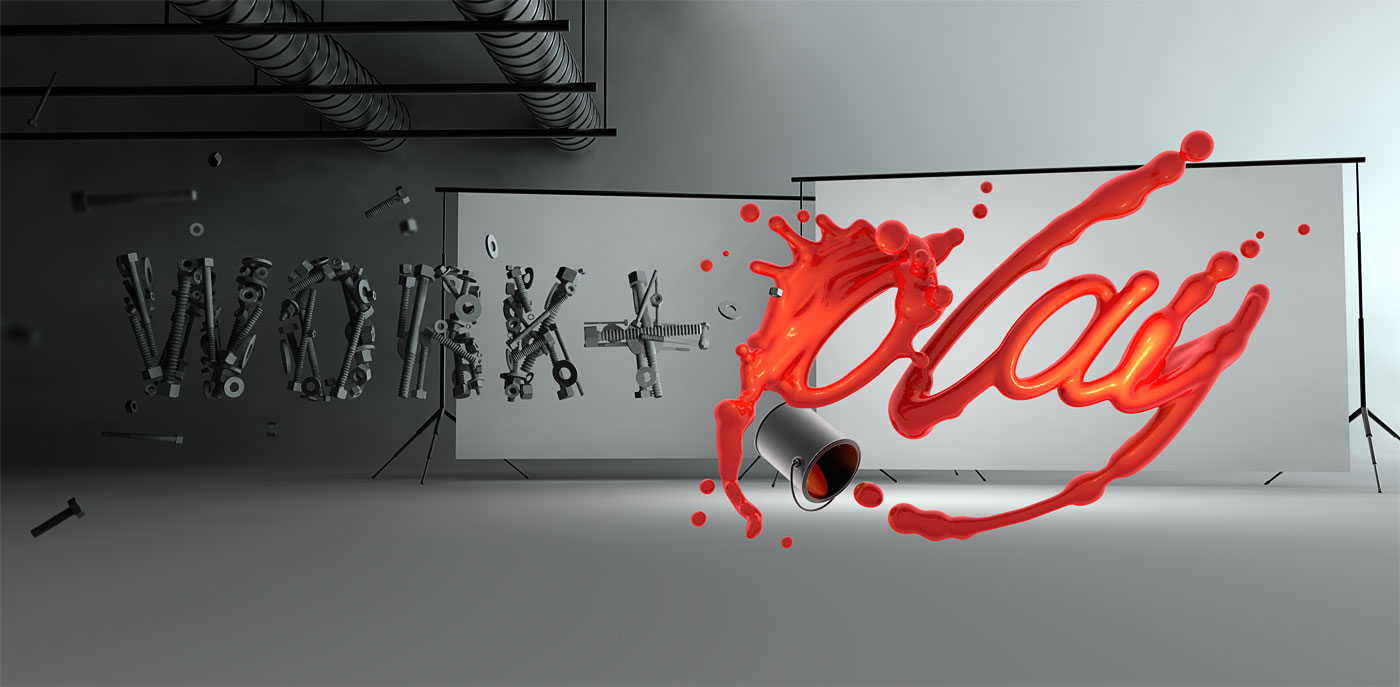
All work and no play makes Jack a dull boy. In this two-part tutorial, we’re going to learn how to bring a simple proverb into a complex typographic illustration that achieves a level of realism without actually using any photos. Yes, we’re going to build this idea from the bottom up. In the first part, learn how to model your own objects in Cinema 4D and prepare them for isolation in Photoshop.
Introduction
A random sighting of the famous proverb "All work and no play makes Jack a dull boy" is what sparked off this idea. Rather than seeing work and play as two separate activities, I sought to reconcile the idea in a single typographic treatment, while still exposing their peculiarities. Eventually, I settled on creating a work environment in a very playful way. To do this, I used a variety of contrasts. For instance, the rather plain perspective and frontal camera position makes this a very plain, static environment. This however is broken by the two words that float around the scene and add a sense of motion. There is also a contrast of light. The work side is somewhat dark, while the play side is well lighted. All in all, this is typically organized working environment that has somehow lost control of itself, in a good, entertaining way.
Step 1
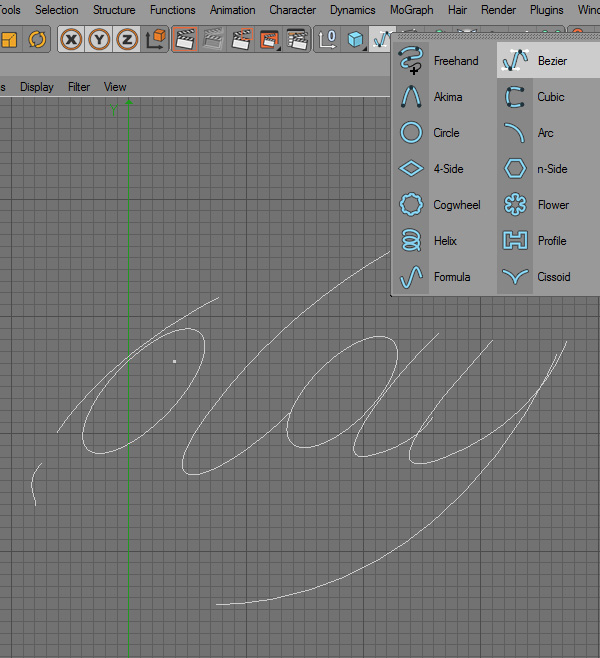
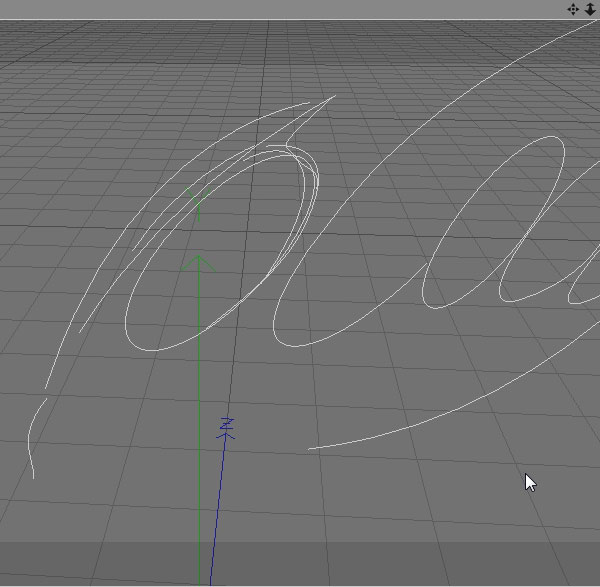
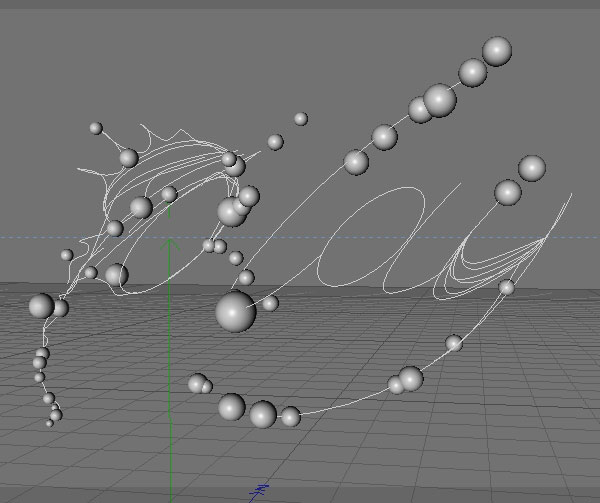
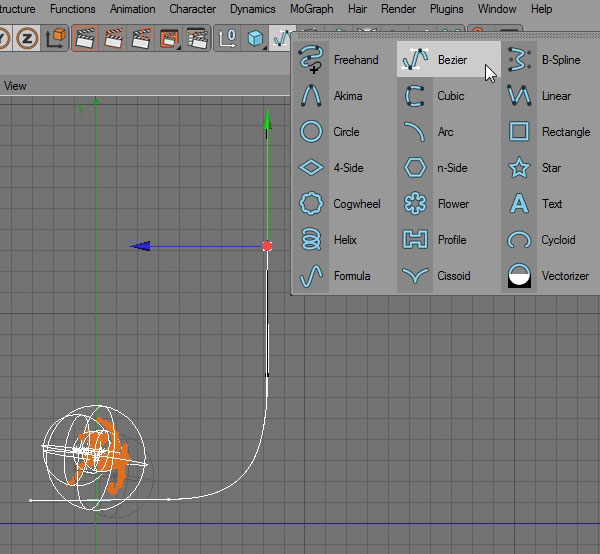
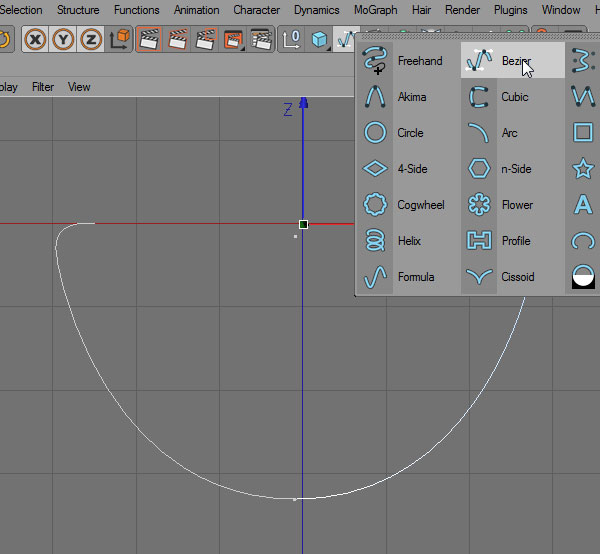
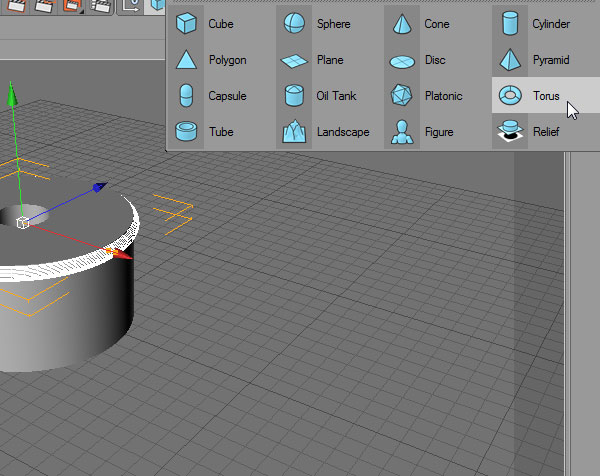
The program we’re going to start in is Cinema 4D. The first thing we’re going to tackle is the word ‘play’. If you feel you need a reference for the letters, it’s a good idea to open Illustrator and trace the basic paths over an existing script font. In this case, I made a few basic lines that will become the base of the word. To create your own, enter the front view in C4D and trace the letters with the Bezier Tool.
Step 2
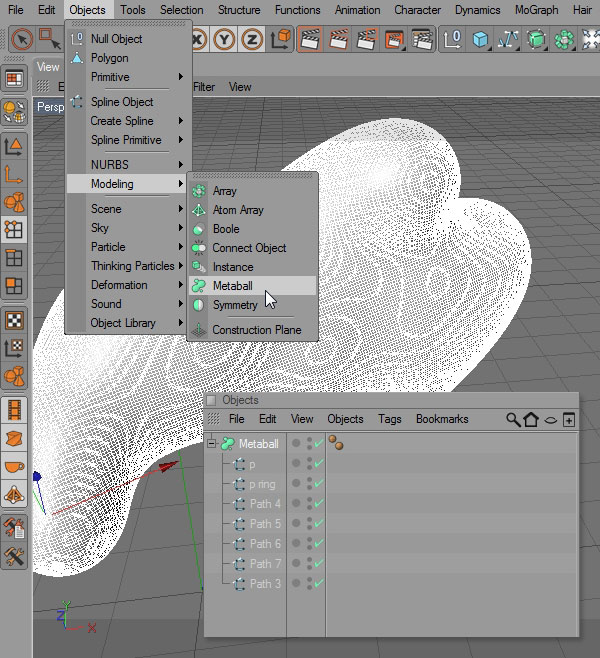
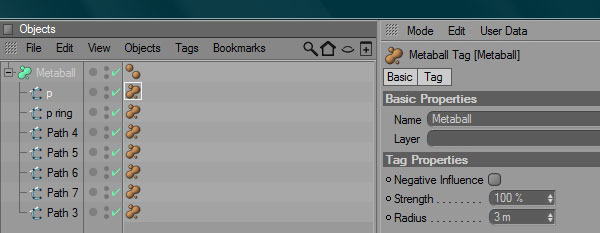
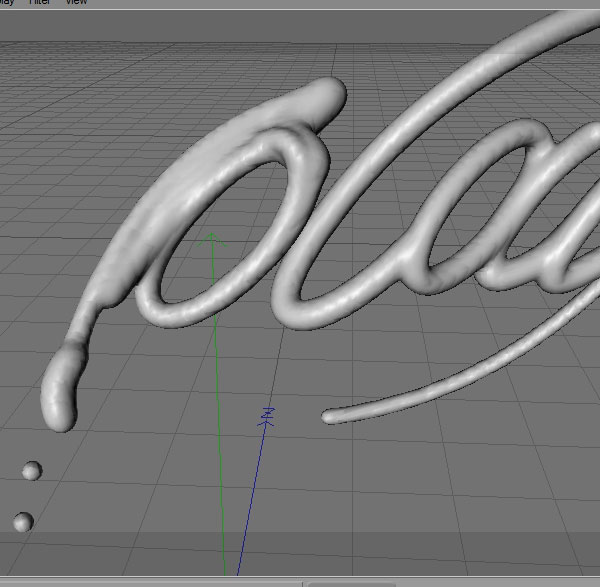
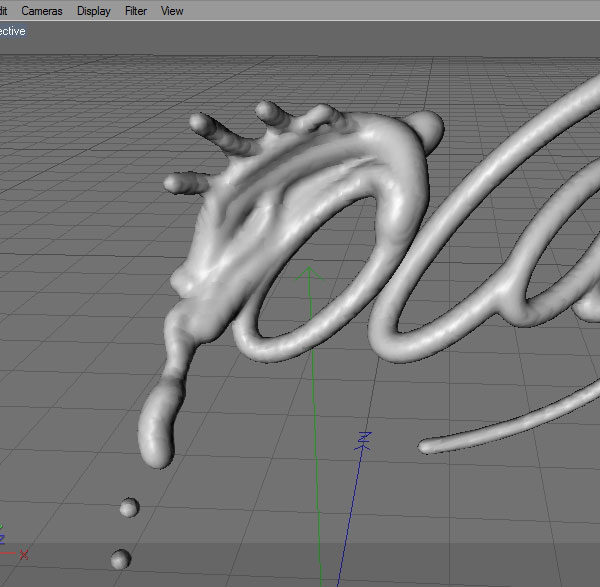
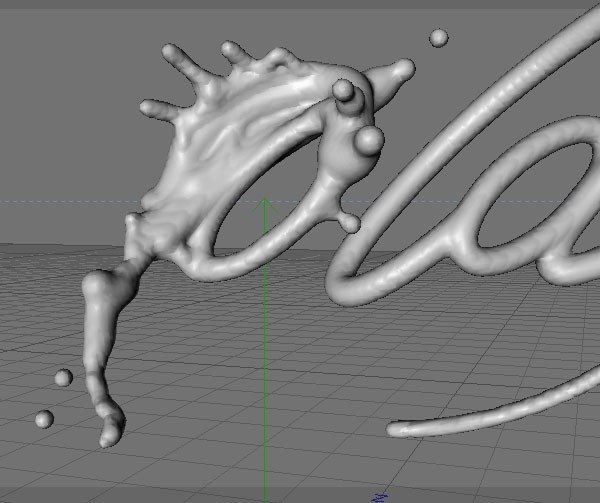
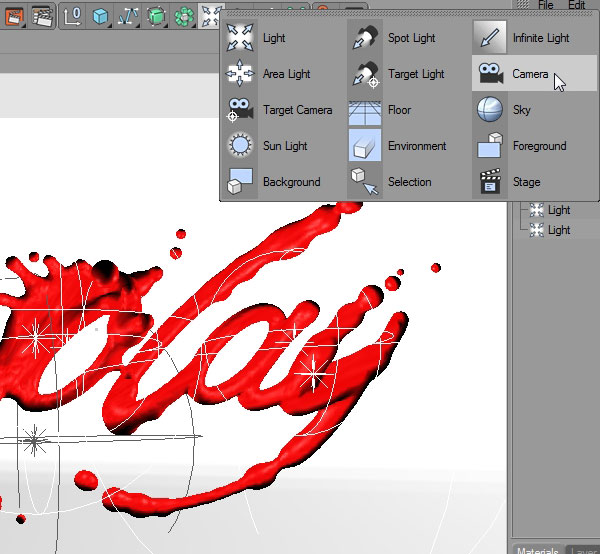
In order to turn this into a paint-like material, we’re going to use Metaballs. You can find it under Objects > Modeling > Metaball. To activate it, just drag all the paths you make on top of it in your objects menu. At first it will look rather odd, because we haven’t edited the paths with a Metaballs tag. You can use this tag to fine tune your results. Firstly though, click on the Metaballs object in the Object menu. Now click on the Object tab and change the Editor Subdivision to 3m and Render Subdivision to 0.2. The lower the number, the more precise result, and the longer it will take your computer to process the information. Also, as we add more paths and spheres to the metaballs object it will get harder and harder to update. Make sure you turn it off when creating new paths for it by clicking the tick mark in the Objects menu.
Step 3
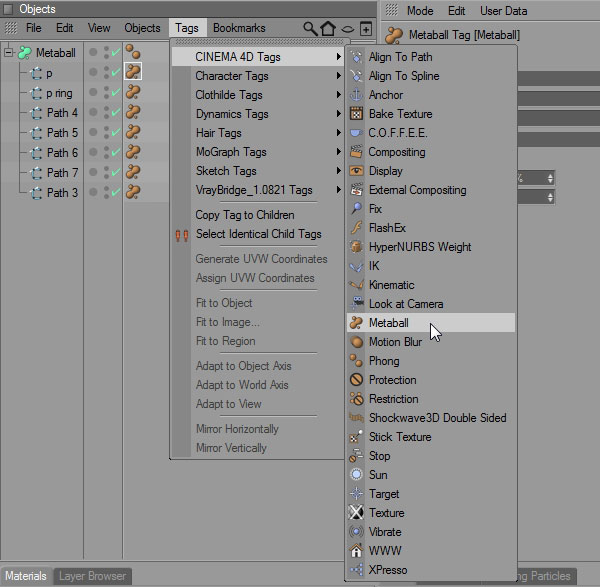
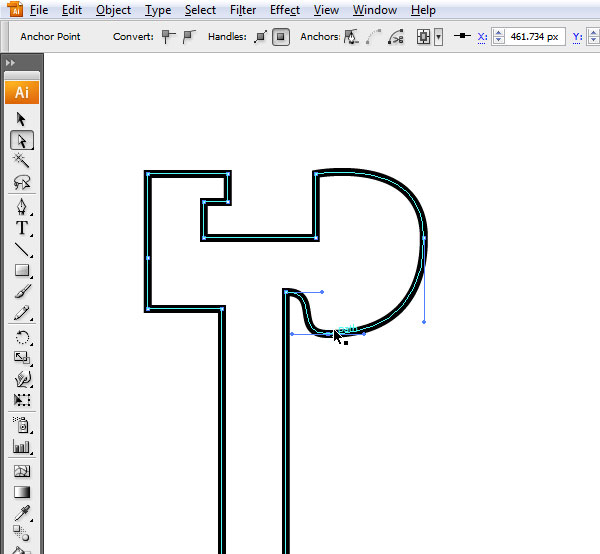
Now we’ll add a Metaballs tag to the paths. For any paths you create, drag one of these over it.
Step 4
For each path, specify a strength of somewhere in between 1 and 4. You’ll have to be very specific though, as sometimes you may need a 1.1 or 1.2 value.
Step 5
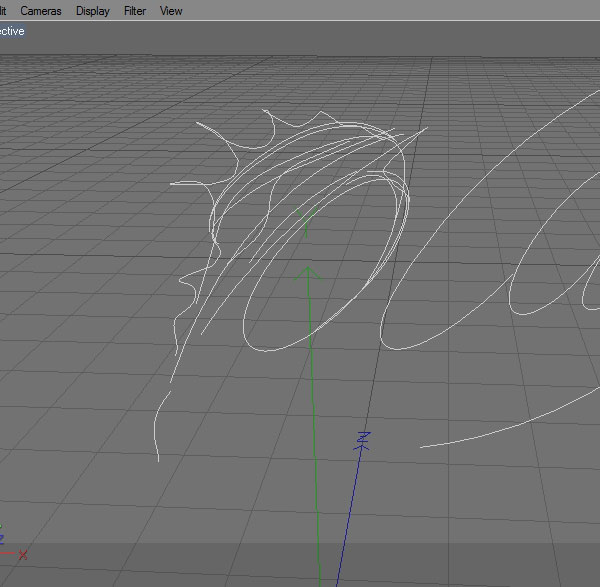
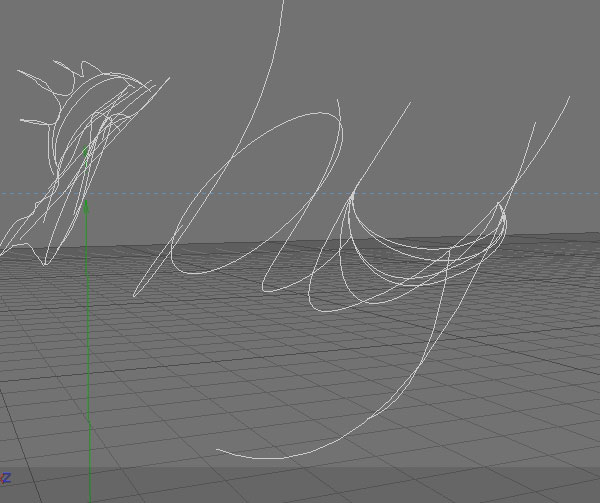
Start adding extra paths to the letter P.
Step 6
A few extra ones should mimic a splash. Remember to edit the points of each of these paths so that it doesn’t end up looking flat. You can drag this in three-dimensional space to achieve that look.
Step 7
Move on to the letter ‘y’ and repeat the process.
Step 8
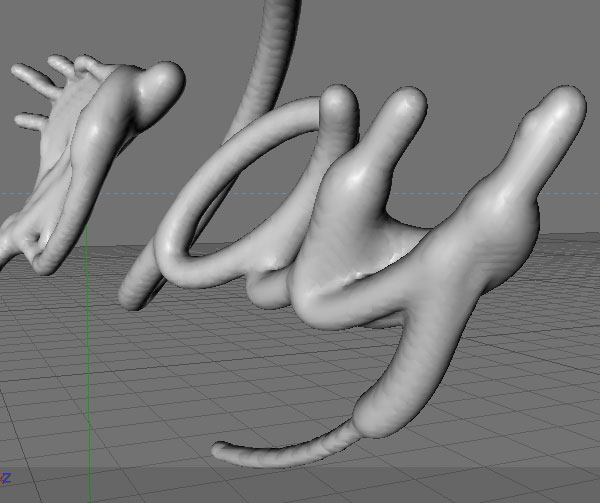
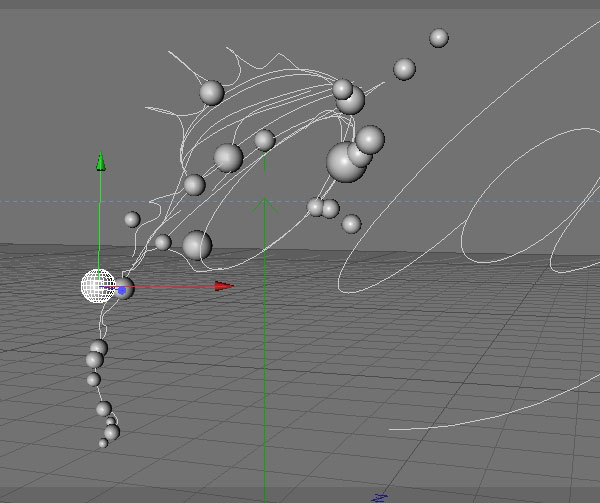
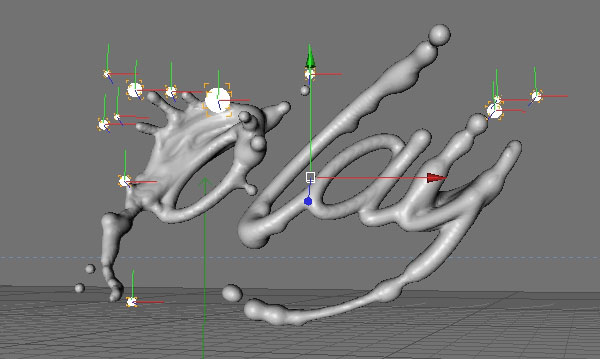
Now we’re going to switch over to spheres. Create a few spheres that intersect the paths. There’s no need to create tags for these. Just make them smaller or larger, as needed.
Step 9
Repeat this process and add some more across the word.
Step 10
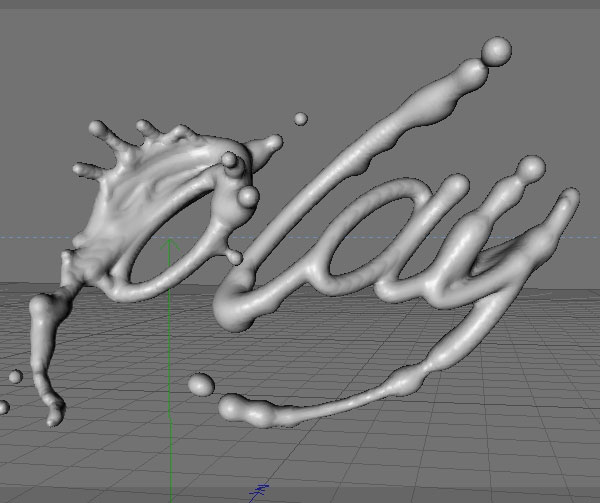
These next few spheres shouldn’t be within the Metaball object. These are spheres that appear to have detached from the main word. Place these near the ends.
Step 11
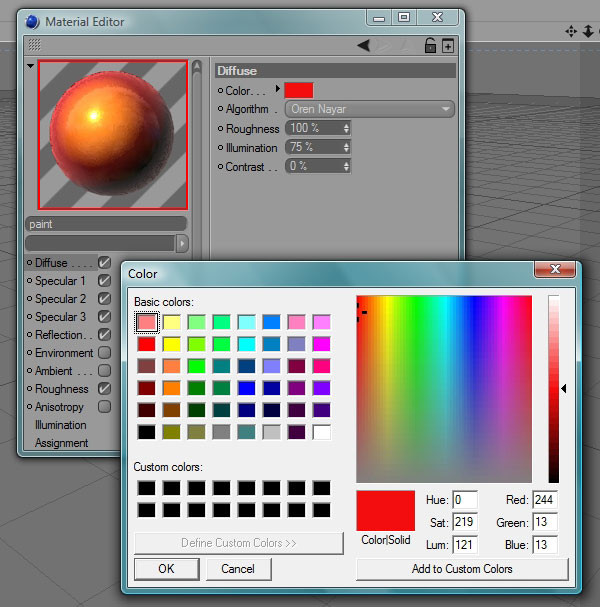
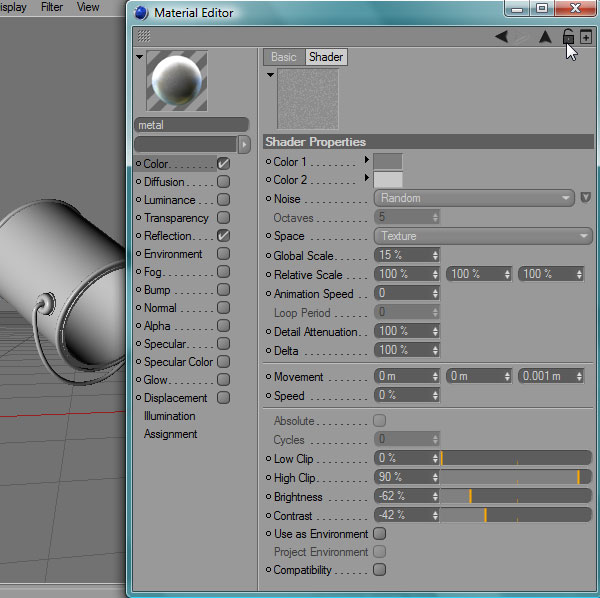
It’s time to add a material to the word. You’ll need to download this free material. Open the C4D file you’ve got and make the following changes. First of all, change the Diffuse Color to a bright red: R:244 G:13 B:13.
NOTE: You can find the final material in the download folder.
Step 12
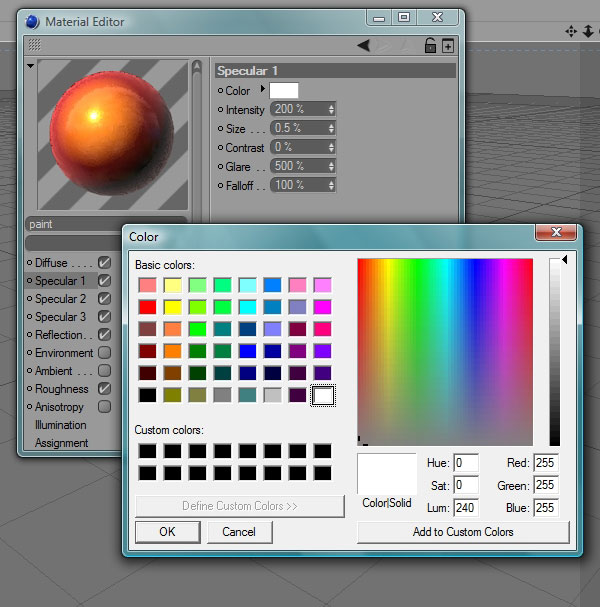
Now change the Specular to a simple white.
Step 13
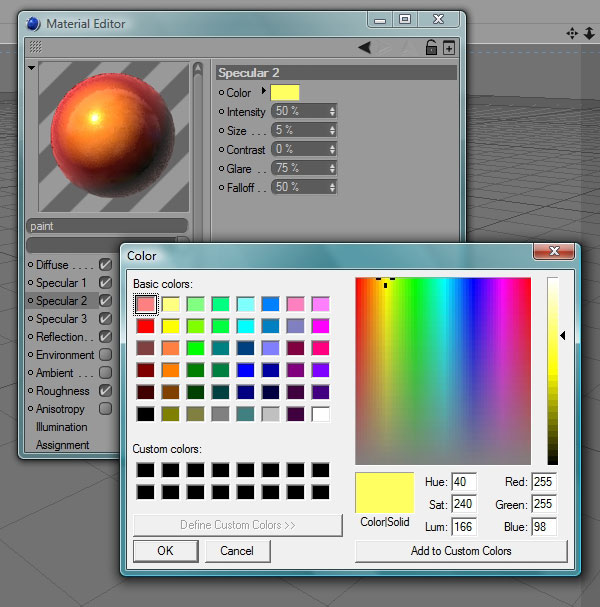
Specular 2 should be yellow: R:255 G:255 B:98.
Step 14
Specular 3 should be a slightly darker yellow: R:247 G:206 B:43.

Step 15
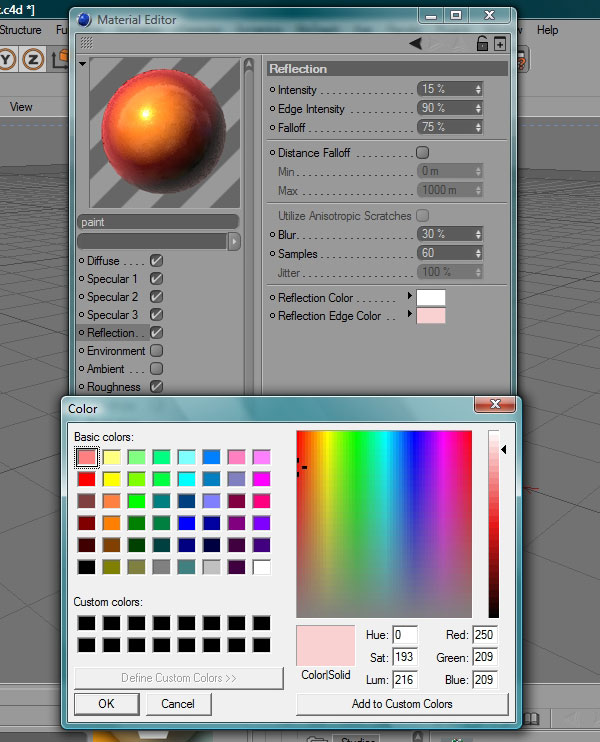
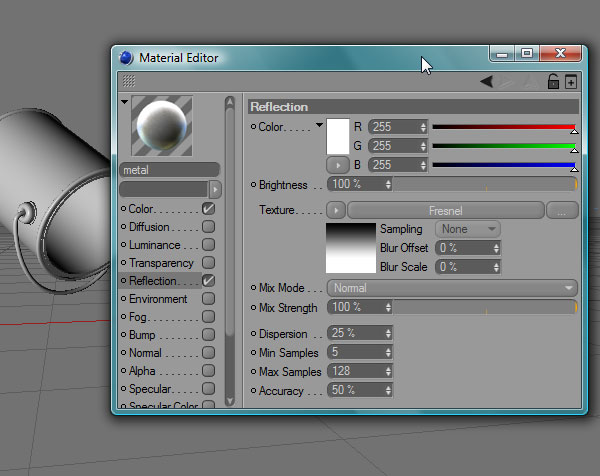
Change the Reflection color to white and the Reflection Edge color to pink: R:250, G:209, B:209.
Step 16
All you need to do now is copy the material and paste it into the scene. Note that your cursor needs to be over the material in the Material Menu for this to work. Then just drag it over the Metaball Object and over the other spheres.
Step 17
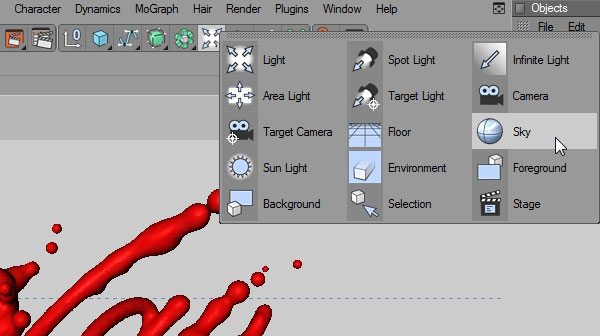
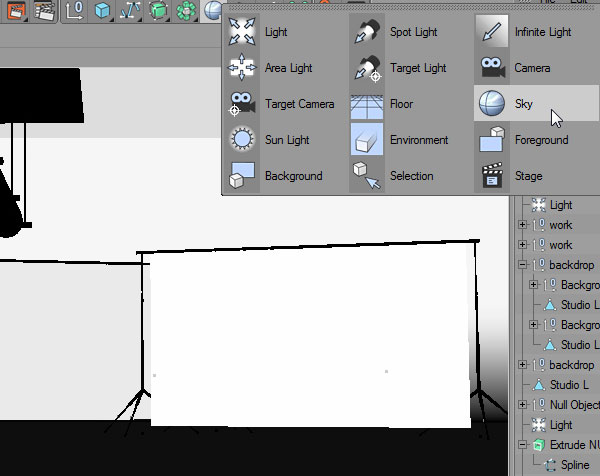
Now add a Sky Object. There’s no need to give it a material. It’s normal white will do just fine, as we don’t want it to be too bright.
Step 18
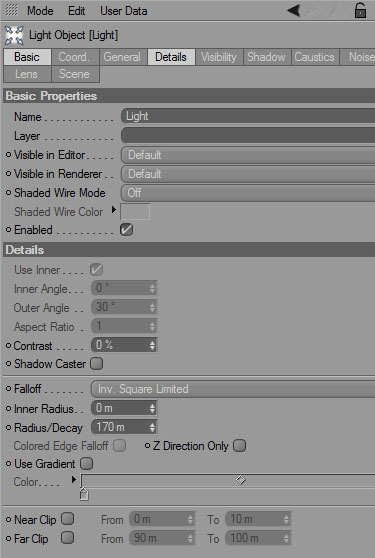
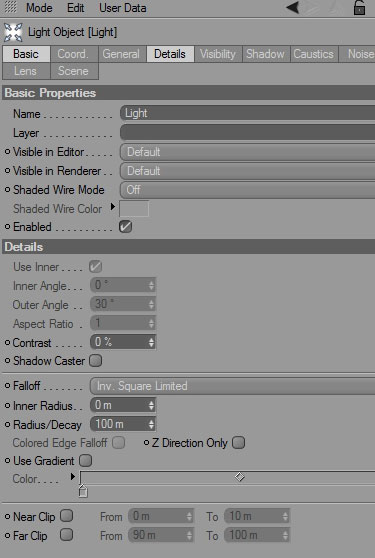
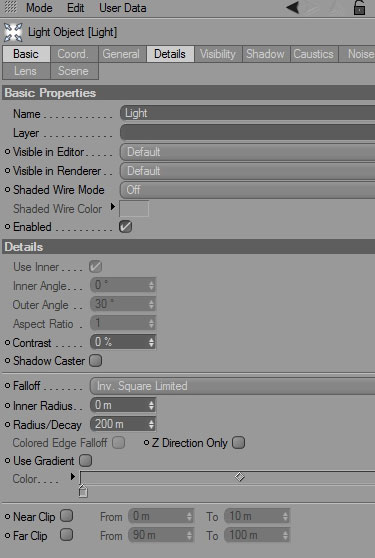
Our paint material has a double coat. The inner coat is not visible, because we need to activate it with proximity lighting. Add a first light to the scene, and use the second screenshot to edit it. Don’t forget to enable Falloff – this limits the range of the light to a specified amount.
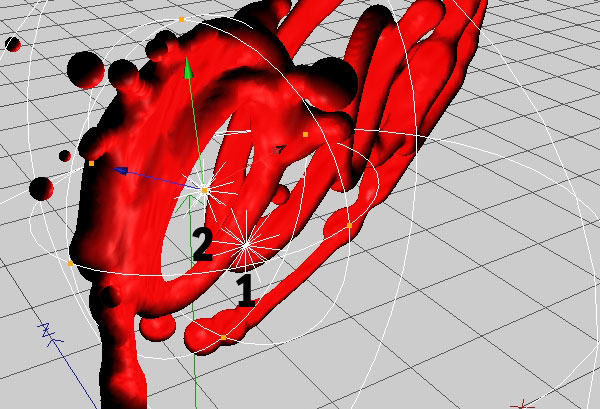
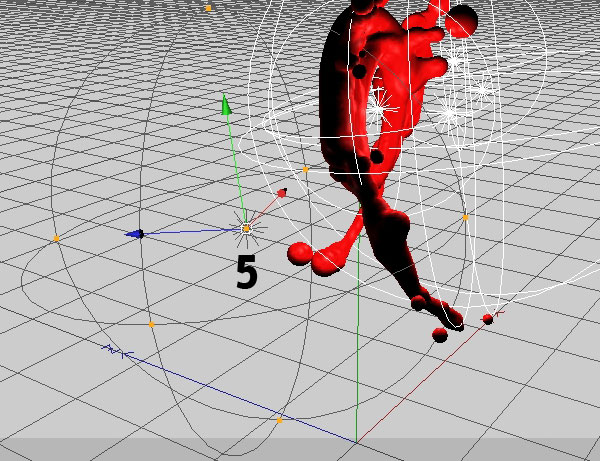
Step 19
Add a second light in the same technique. I’ve numbered it here, as it gets a bit confusing.

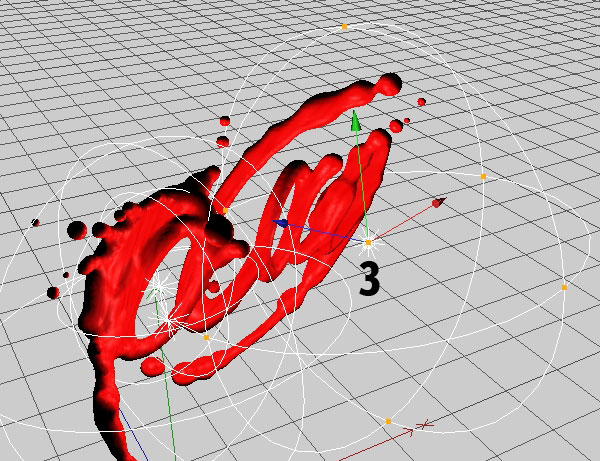
Step 20
Add a third light near the last two letters.

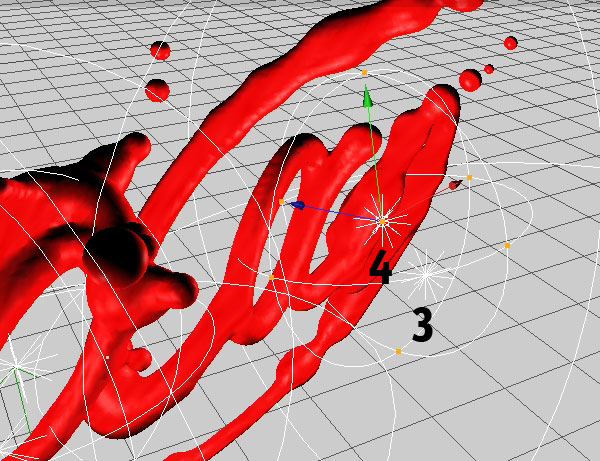
Step 21
Add a smaller one to the same side now.
Step 22
And one last light should do it.
Step 23
We now need a background. In the side view, create a rounded L shape spline.
Step 24
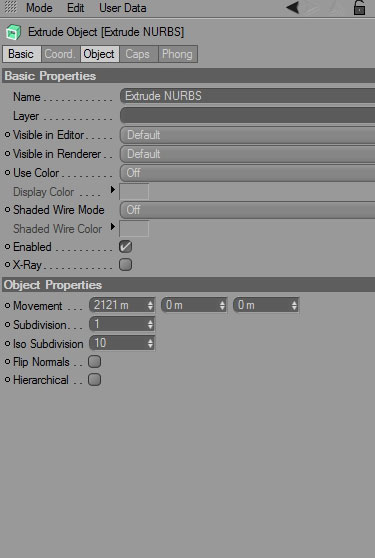
Go back to the Perspective view and Extrude it with the Extrude NURBS object. Once you created one, just drag the spline on top of it inside the Object Menu. Use the settings shown below.
Step 25
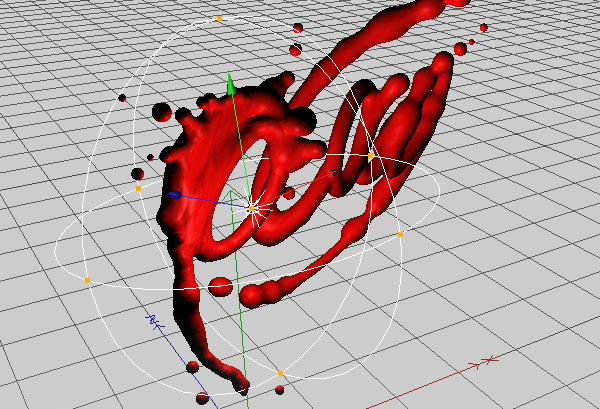
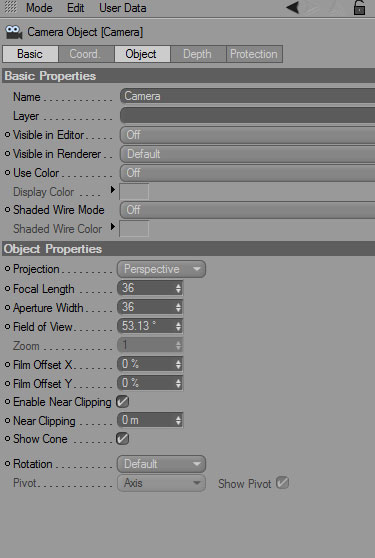
Find an angle you like, and create a camera. Don’t forget to edit its settings as shown in the second screenshot.
Step 26
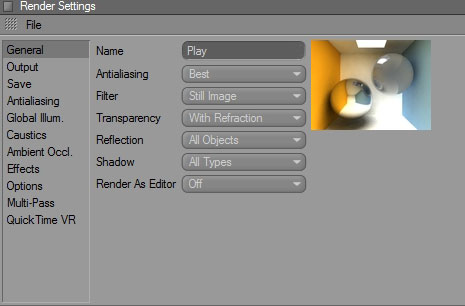
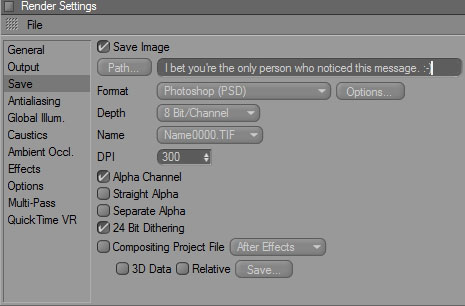
That’s it for this word. It’s time to edit the render settings (Render > Render Settings) and render this thing! Use the following settings.
Step 27
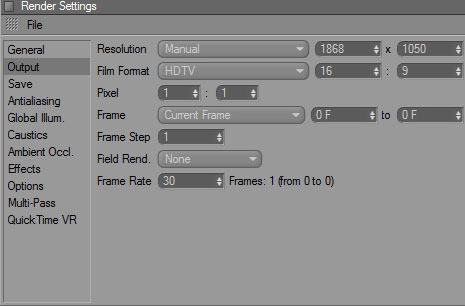
The Output is where you decide the size of the final image. This one should be 1688 x 1050 px.
Step 28
Next, choose the format you want. I always save the in psd format, and tick Alpha Channel so I don’t forget it when I actually need it. But since we have a backdrop that’s also an object, the Alpha Channel is redundant here. You’ll need it later though!
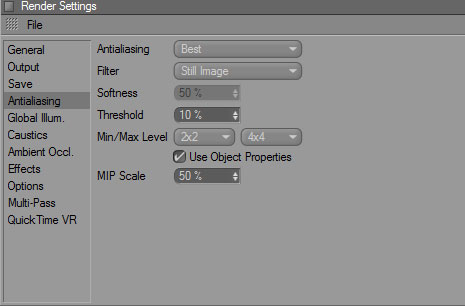
Step 29
I’m always obsessed about anti-aliasing, and so I use 2×2 over 4×4, though 1×1 over 4×4 will do fine as well.
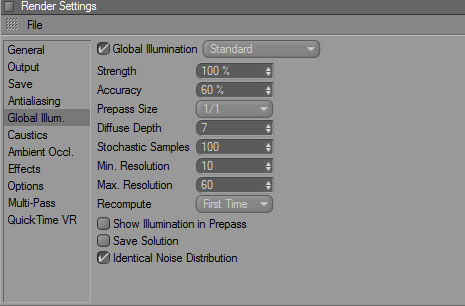
Step 30
Enable Global Illumination and change to these settings. This part will affect your render time the most. If you want a quick render, changing the diffuse depth to 2, minimum Resolution to 5 and Maximum to… say 45 should cut back quite a bit.
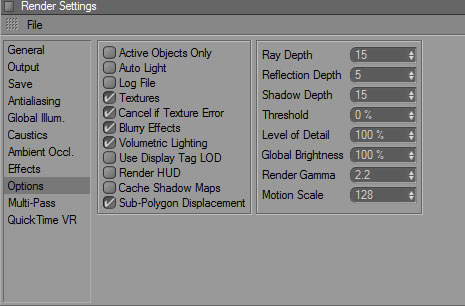
Step 31
And finally, uncheck Auto Light from the Options menu. Don’t render just yet, as we need to create one more element.
Step 32
I usually create the more complex paths in Illustrator just because I’m more familiar with it. You can create this in C4D or Photoshop as well. What matters most is that you have a vector path file that you can merge in C4D.
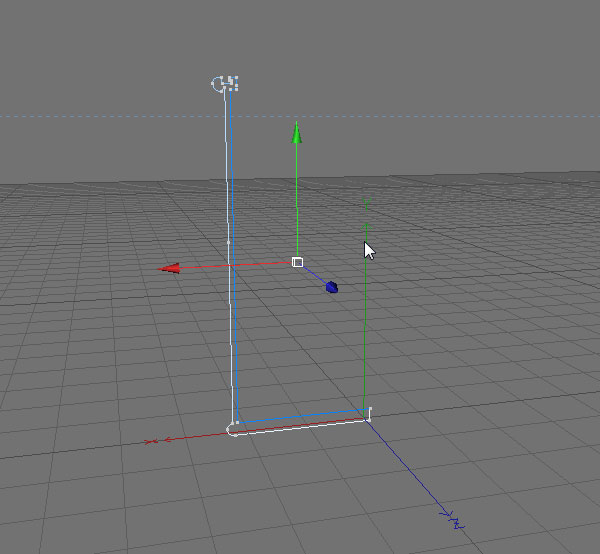
Here, we’re going to create a paint can. Create this shape that we’ll revolve in C4D.

Here’s a close up on the top.
Step 33
When you’re done, save it as an Illustrator 3 file somewhere. Go back to an empty new scene in C4D and go to File > Merge. Place the path into your scene.
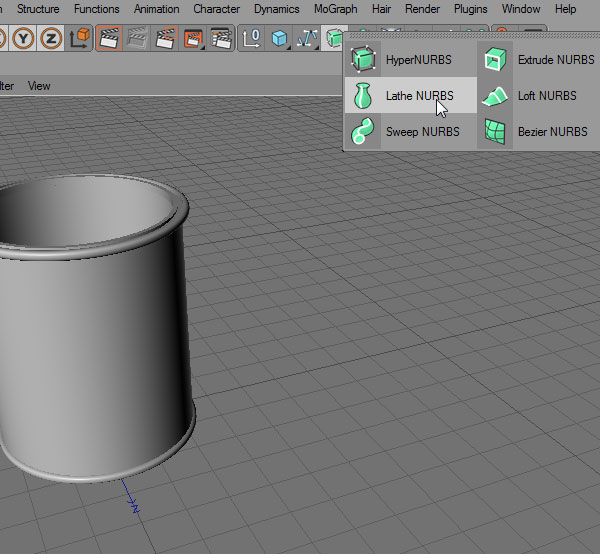
Step 34
Add a Lathe NURBS object and drag the path in the Object Menu over it.
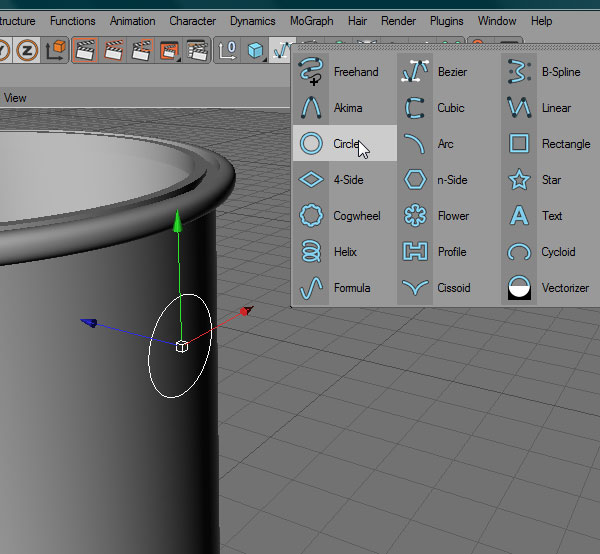
Step 35
Add a Circle Spline and position it as seen below.
Step 36
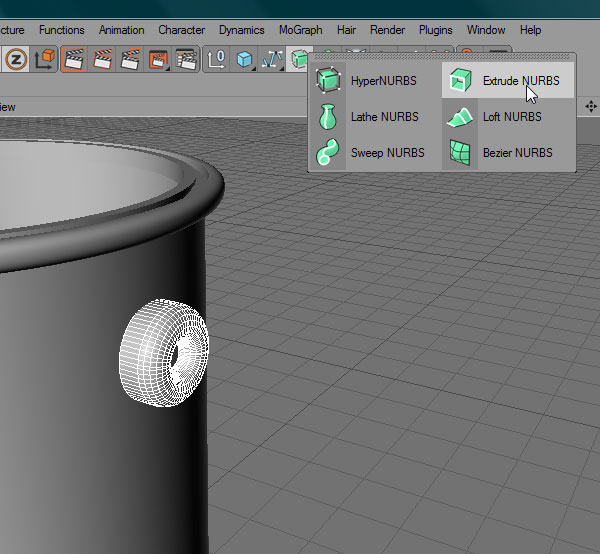
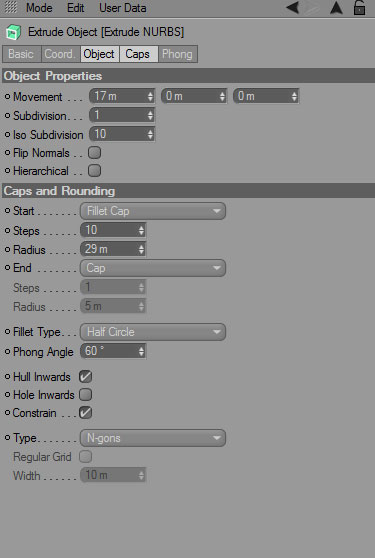
Add an Extrude NURBS and drag the circle path over it. Add a large Fillet Cap as seen in the second screenshot.
Step 37
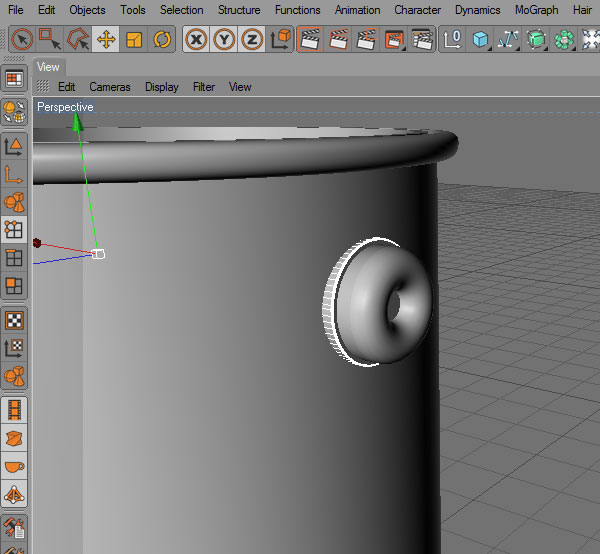
Copy the first knob and make it larger. Push it into the bucket, and change the Cap to a very small one.
Step 38
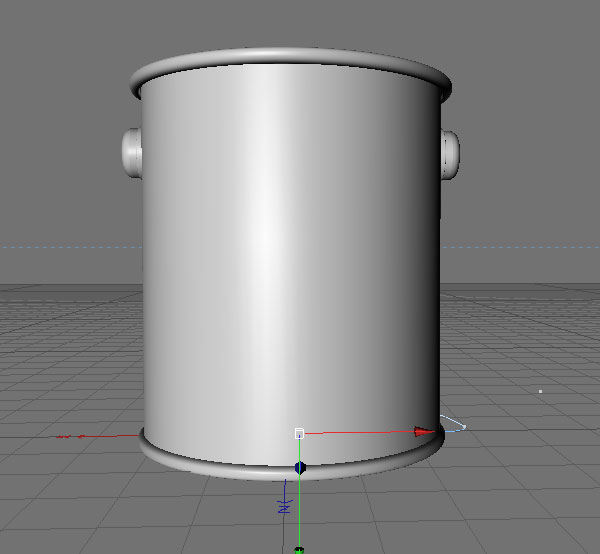
Copy these two, rotate them by 180 degrees and place them on the other side as well.
Step 39
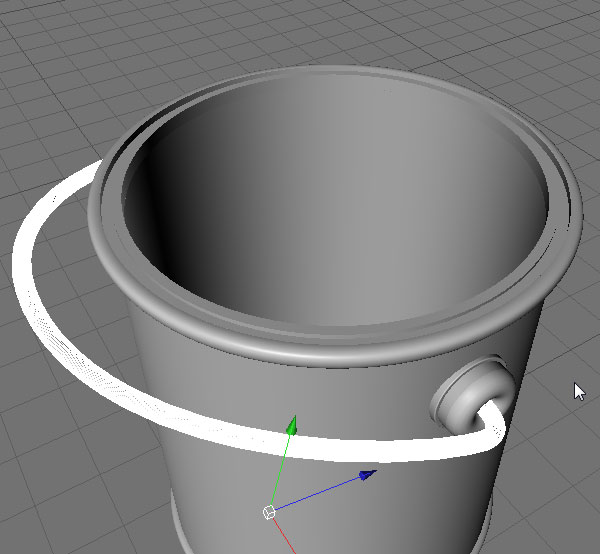
To create the handle, draw a Bezier Spline in the top view.
Step 40
Use a Sweep NURBS and a small circle spline to give it thickness.
Step 41
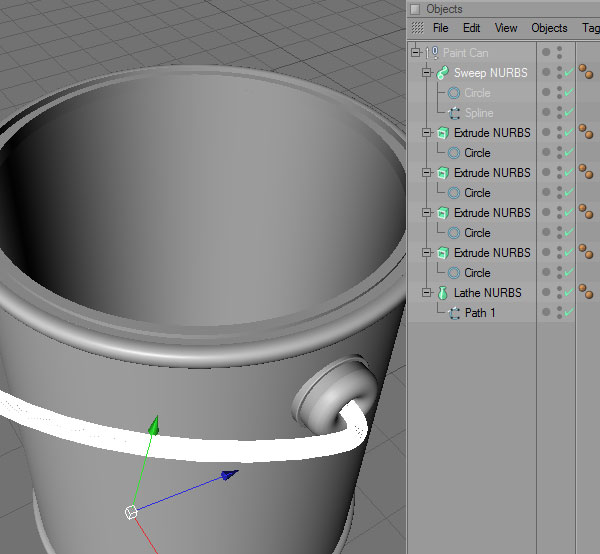
This is what your Object Menu should look like. Select them all and Group them.
Step 42
We’ll now create a simple material for the bucket. Use the following options. In Color, select Noise by clicking on the Small arrow button in the Texture field.
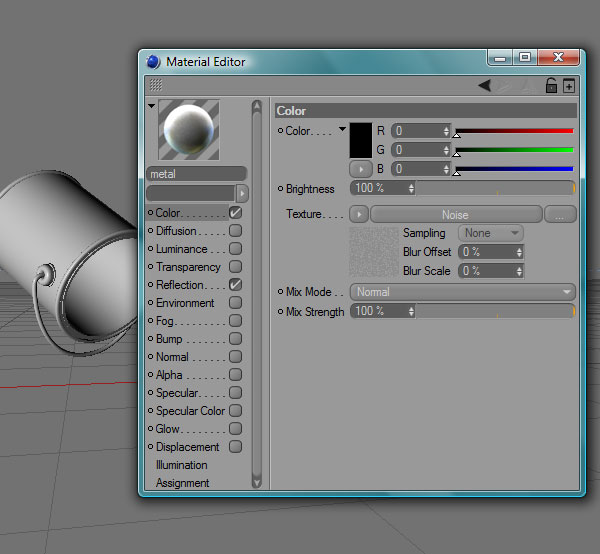
Click on the Noise Tab to bring up these settings.
Step 43
Splendid. Now just copy the bucket into the first scene and scale / rotate it in place.
Step 44
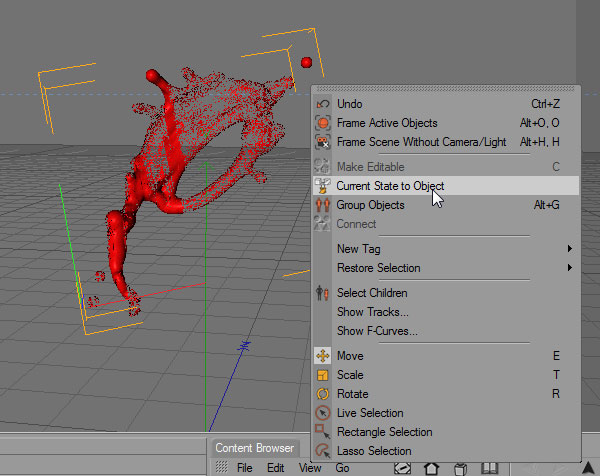
In order to render the scene, we need to transform the Metaballs object into a Polygon Object. This is basically like when you rasterize a vector shape in Photoshop. By doing this, C4D no longer needs to calculate the Metaballs process during rendering. First of all, copy the Metaball into a separate blank scene and delete everything except the letter P. In the Object Menu, Shift + Select all the layers and Right-click > Current state to object. This will take a while, so hang on while C4D kills all your RAM for a few minutes.
Step 45
Once you’ve done that with the rest of the word, paste it back into the scene and render it. Your results will vary but my configuration took about 11 hours to render. That material is an absolute pain.
Step 46
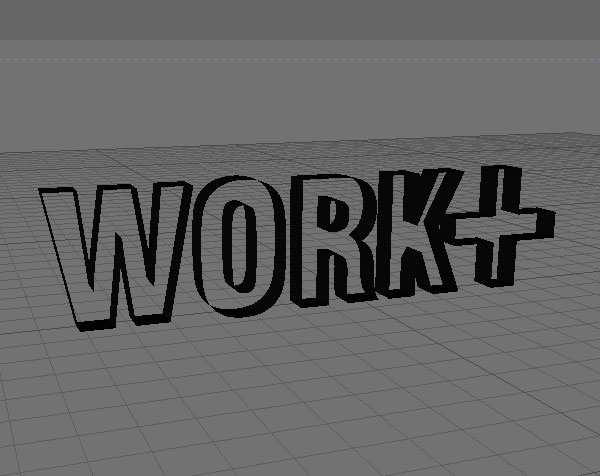
Let’s move on to the second word now. As a guide for the screws, I created a mold, if you will. You can create one yourself by creating a Text Spline, applying an Extrude NURBS, and knocking off the Caps in the Caps tab. Create all this in a new blank scene.
Step 47
Download these free nuts and bolts. This whole part is simple in concept, but very laborious. Resize and rotate several bolts into the first letter.
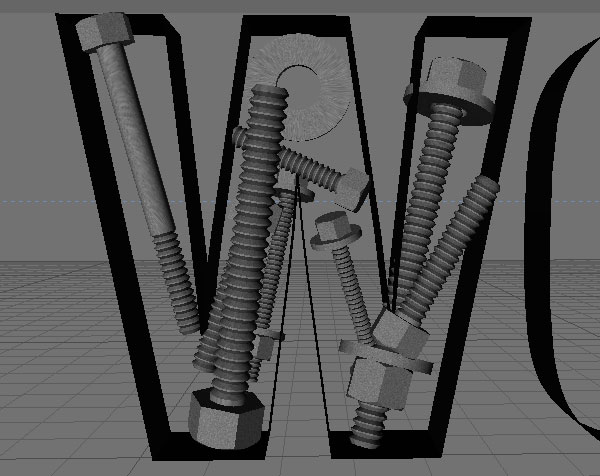
Step 48
Add more into the mold, but try not to make them touch or intersect.
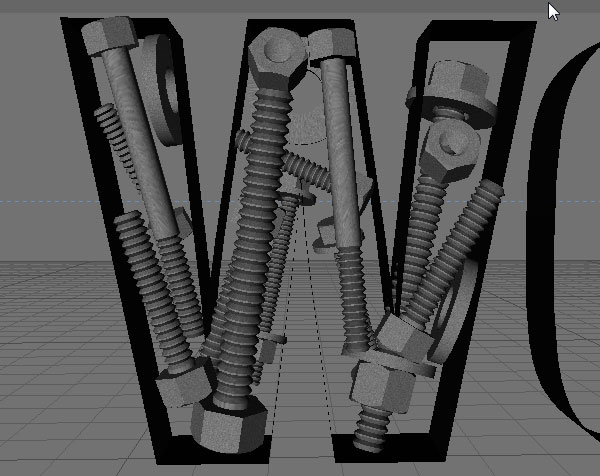
Step 49
Here is the first letter, all done. Add smaller bits and pieces to fill in the blanks.
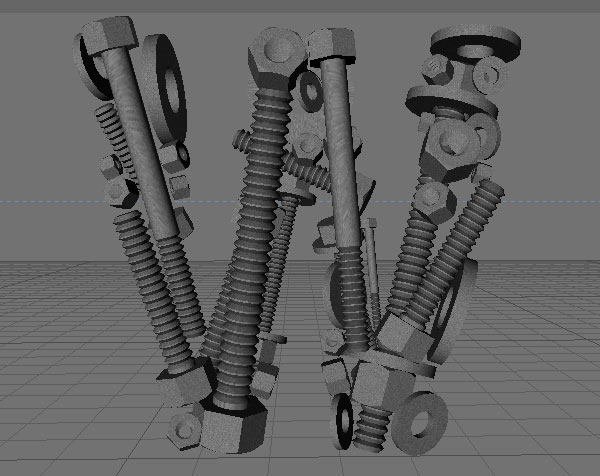
Step 50
Repeat the process for the rest of the word.
Step 51
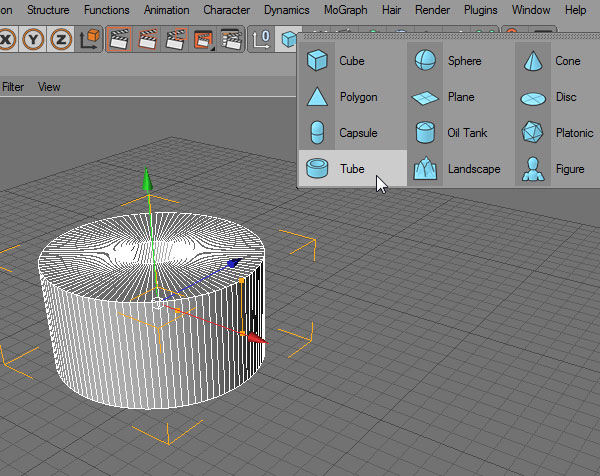
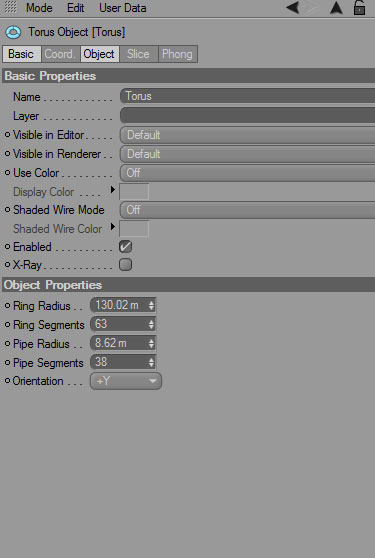
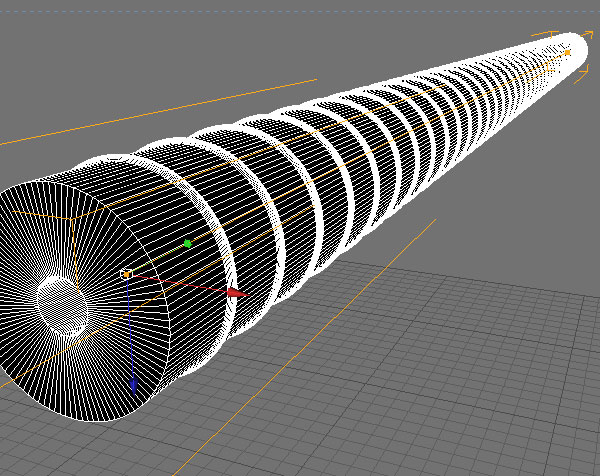
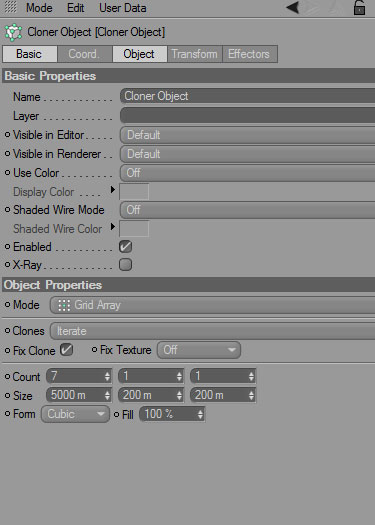
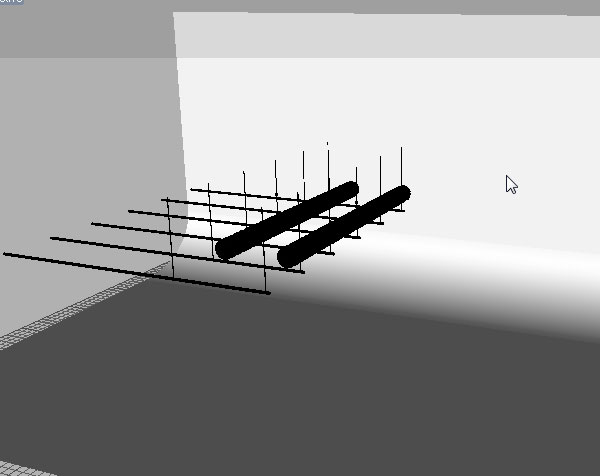
We’ll now move on to creating the ventilation shafts. Nothing fancy, just a couple of multiplied objects. The first one is a Tube Object.
Step 52
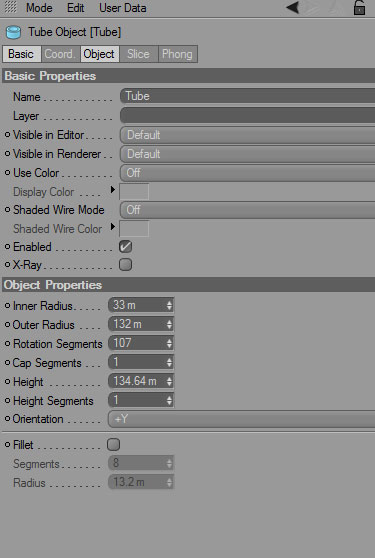
Apply the following settings to the ventilation shafts.
Step 53
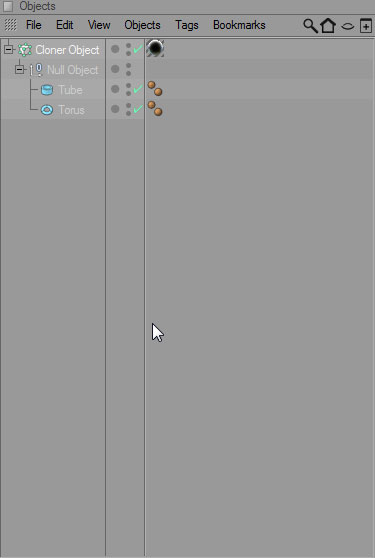
Now go to MoGraph and add a Cloner Object. Drag the two objects on top.
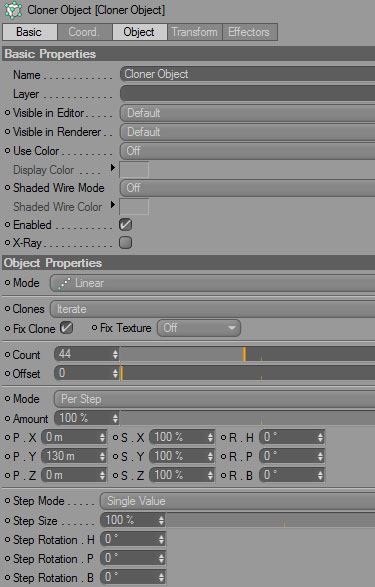
Step 54
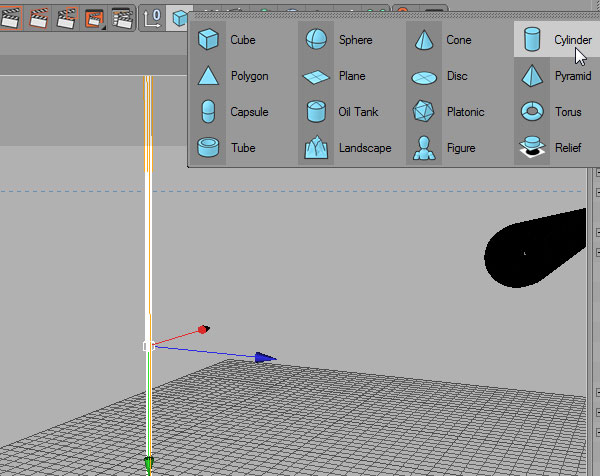
Let’s create a frame now. Create a very long Cylinder.
Step 55
Let’s create a second frame now. Create a very long Cylinder and Multiply it in the same way.

Step 56
Copy the frame Cloner Object, resize the tube and place it as seen below.

Step 57
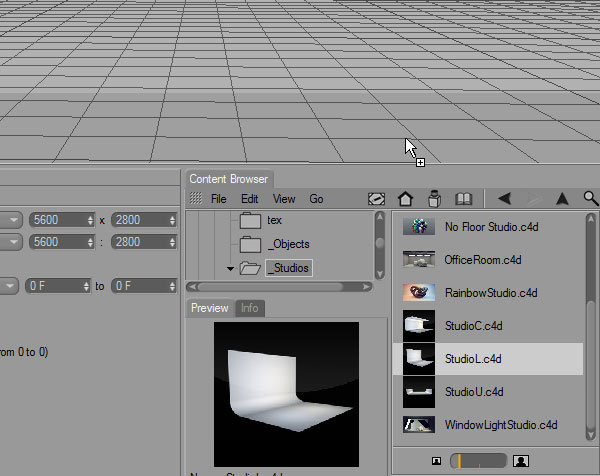
For this part, I used a few objects from Greyscalegorilla’s Light Kit Pro. You can model all these things yourself, but this one’s a real time saver. If you have it, drag a StudioL object into the shaft scene.
Step 58
Make it large. Very, very large ![]()
Step 59
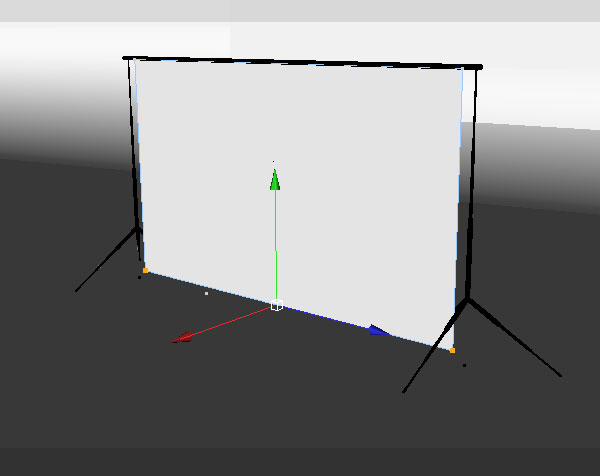
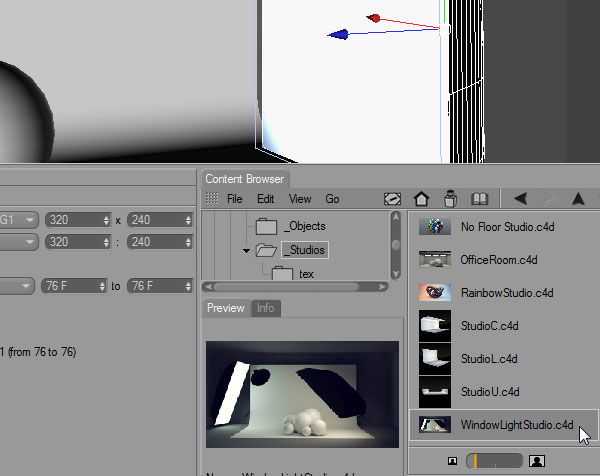
Also from the Light Kit, open WindowLightStudio and copy the white backdrop.
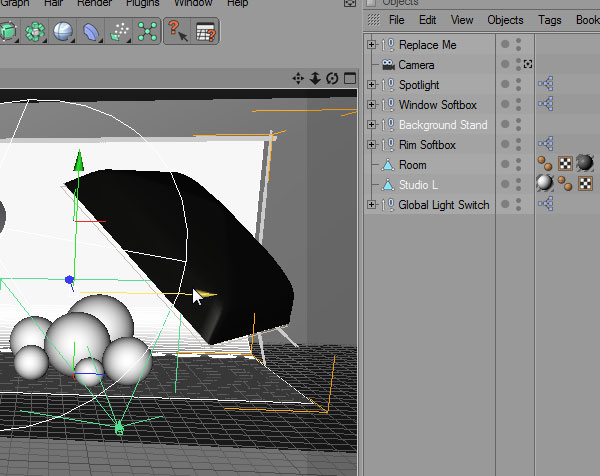
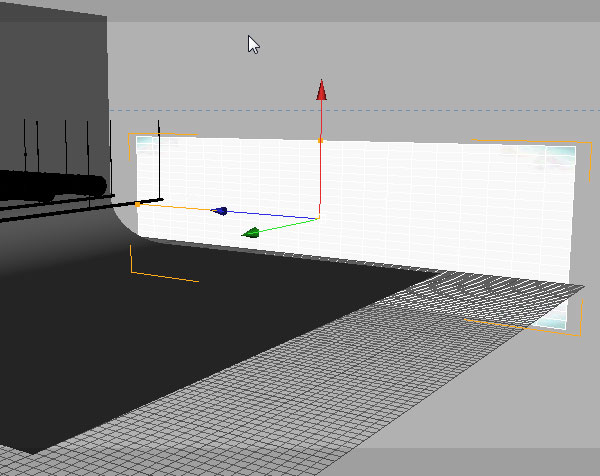
Step 60
Paste it in our scene, and delete a few endpoints to turn it into a straight, white plane, rather than an L shape.
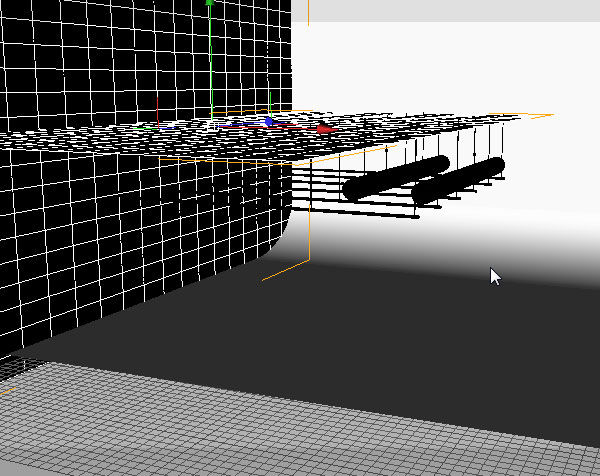
Step 61
Make it smaller and place it in the scene.
Step 62
Make a second copy and position it as seen below.
Step 63
One final thing we’ll use from the Light Kit is the blue softbox. Copy it into our scene.
Step 64
Turn it into the mother of all softboxes!
Step 65
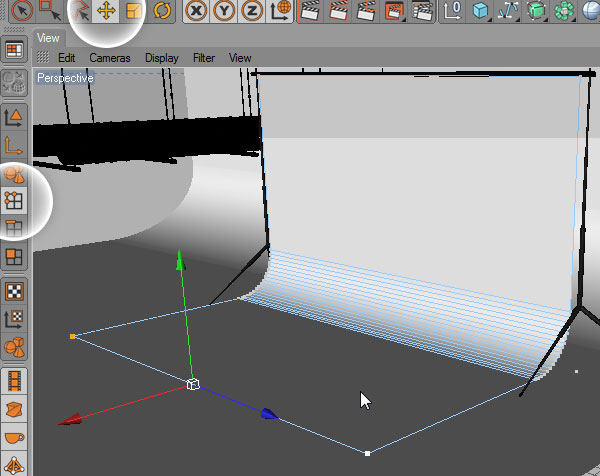
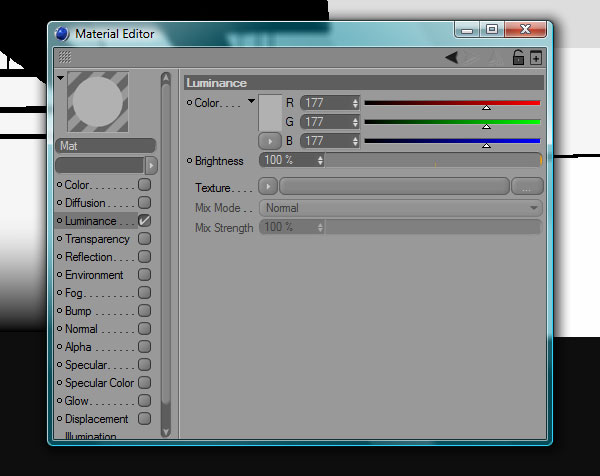
In order to darken the left side, I created a black ceiling and wall. Create two similar planes and apply a new material that only has 0% Luminance.
Step 66
Time to add a Sky Object. Add a light Gray material to it, as seen in the second screenshot.
Step 67
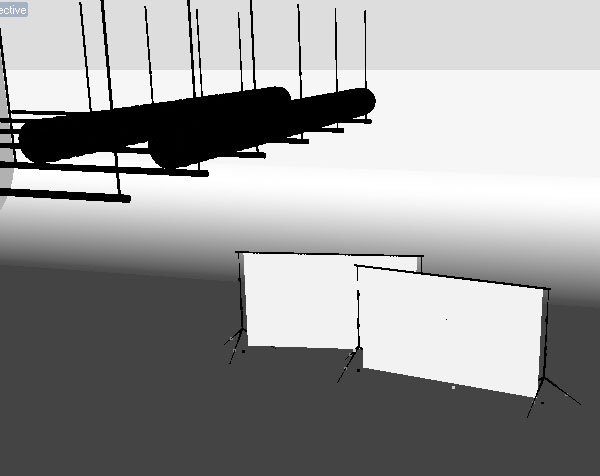
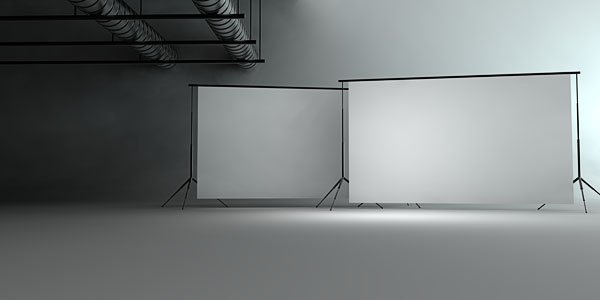
All done! Here’s a final render of the scene. Still, we’re going to have to make changes to these objects in Photoshop. To do that, hide everything, except the backdrops, uncheck Global Illumination to get a much faster render, and save the render as a psd file with Alpha Channel included.
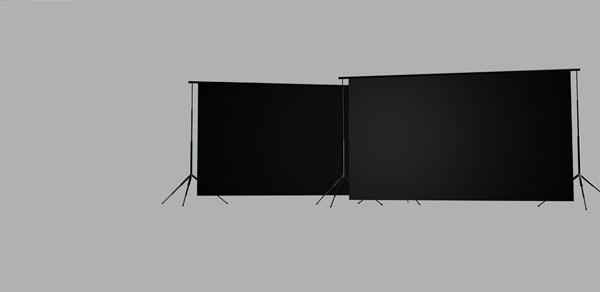
When you’re done with that, repeat the process to isolate just the shafts and make an Alpha Channel file.
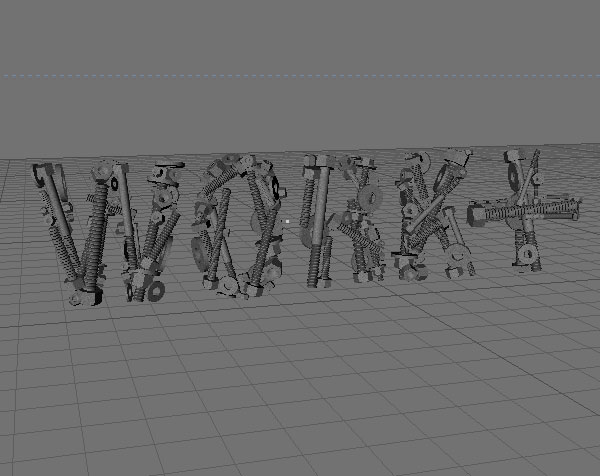
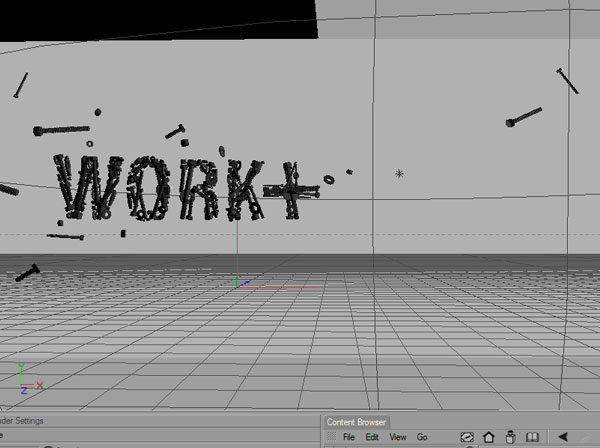
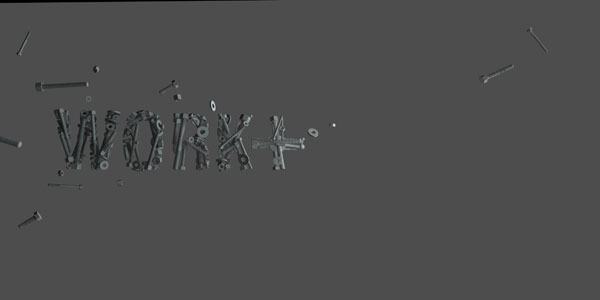
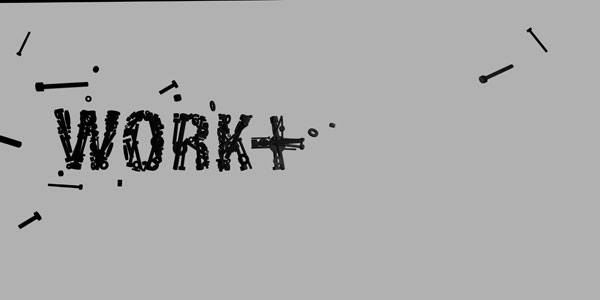
Step 68
Still, you’re probably wondering what happened to the first word (work+). We’re going to use this exact scene, but alter it slightly. First of all, paste the word into the scene and find a proper place for it. Copy some of the bolts and paste them around the scene. Hide the backdrops, ventilation shafts and giant L shape backdrop. Leave the black walls, sky object, and softbox in place. Below you also have two images that show the final render and its alpha channel render.
Final Image Preview
With a bit of stitching together, here’s what you’ll get.
No comments:
Post a Comment