Final Product What You'll Be Creating

Tutorial Assets
The following assets were used during the production of this tutorial.
Step 1
Open the logo in Photoshop. Note that the PNG file contains transparency—this is important when we convert to 3D. There’s no need to adjust the image size since we will change it at the end when we save it as an animation.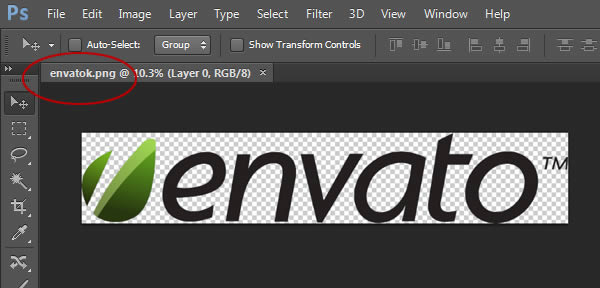
Step 2
Select the Crop Tool and extend the top and bottom to give our scene more space. Hit Enter to commit to the changes.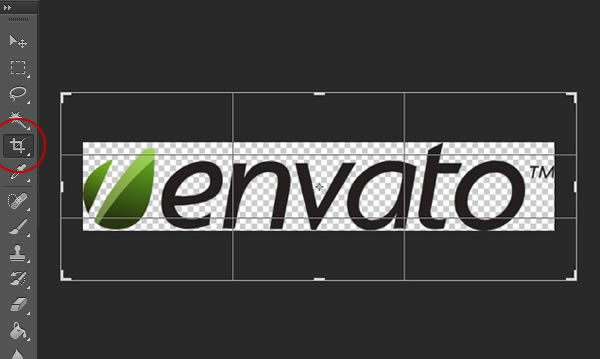
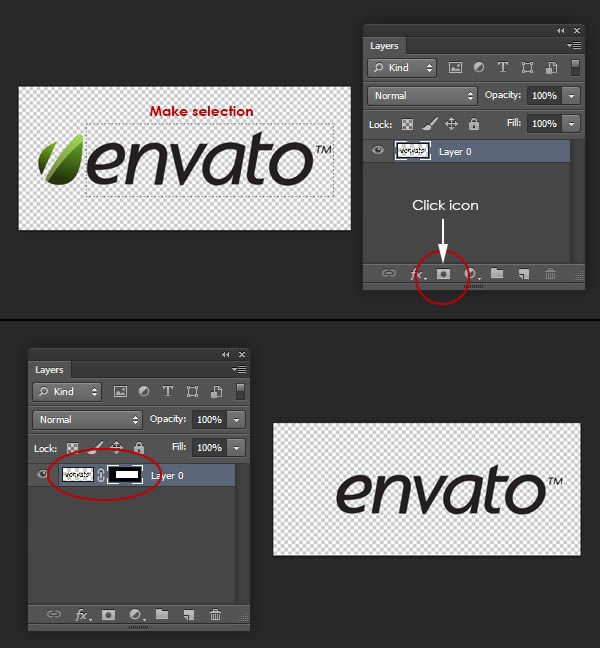
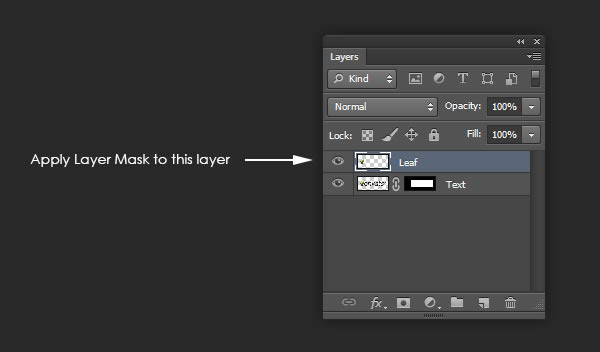
Step 3
To make things easier, I’ve renamed the only layer to “Text.” Go ahead and make a copy of this layer, rename if “Leaf,” and click on the Layer Mask (this targets the mask, making it editable). Press Command/Ctrl + I to invert the selection and thus, isolating the leaf. The result should look identical to the original image that we opened. The only difference is that the text and leaf icon are now on separate layers.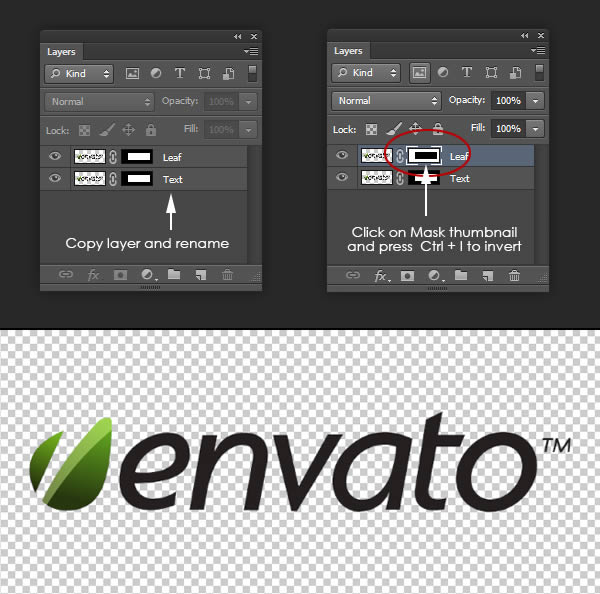
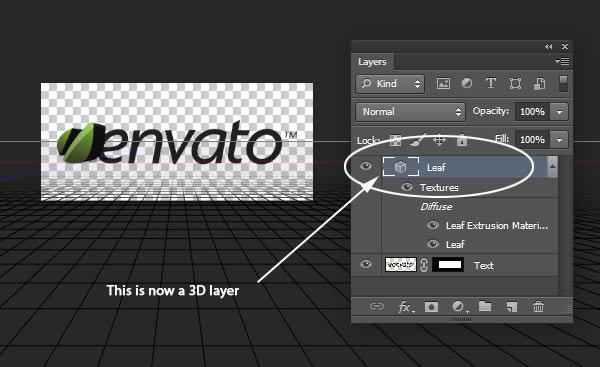
Step 4
In the 3D panel, select the “Leaf” object (denoted by the extruded star icon) and go to the Properties Panel and set the Extrusion Depth to 35. Also, deselect Catch Shadows and Cast Shadows.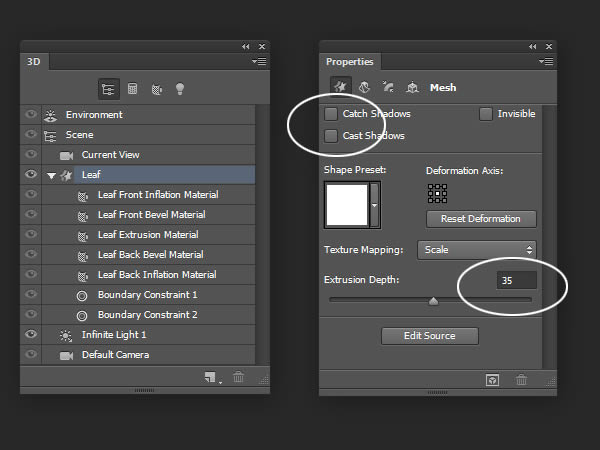
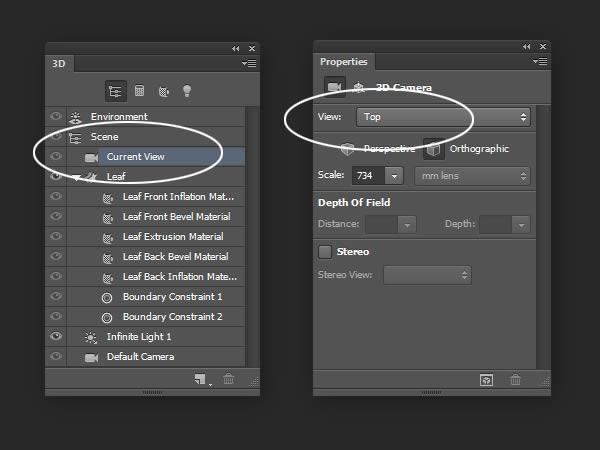

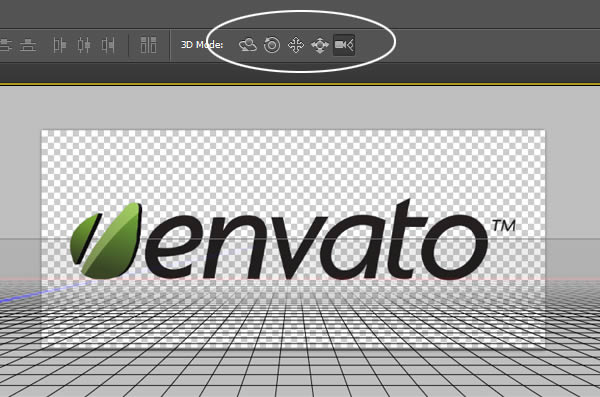
Step 5
Currently, our canvas is showing the Top View. Select “Default Camera” in the 3D panel to reset the camera. Notice that the leaf object does not appear to be in its proper position. We will fix this in the next step.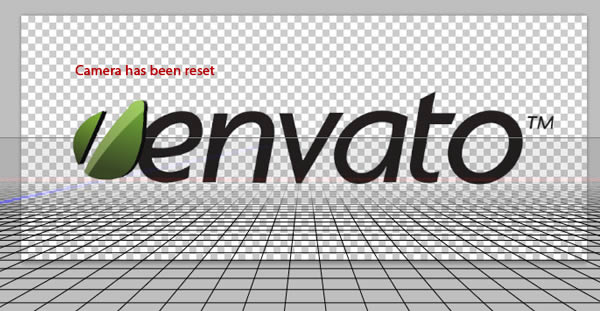
Step 6
Now, we’re ready to animate—click Create Video Timeline in the Timeline Panel. If you don’t see the timeline panel, then go to Window > Timeline.
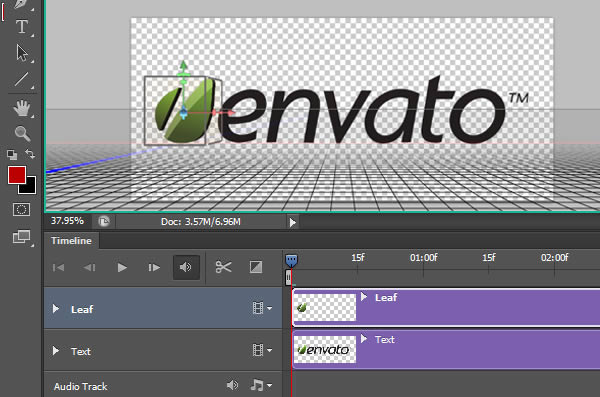
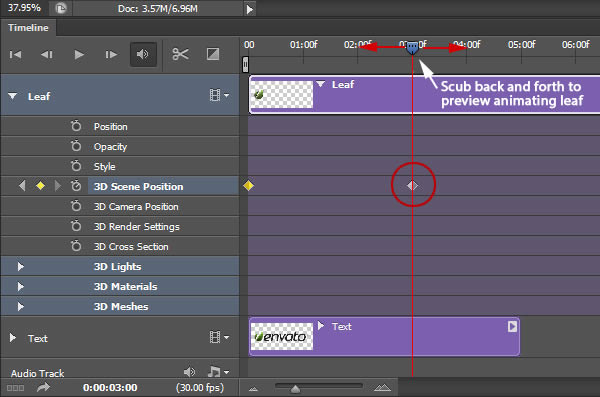
Step 7
Since we want to animate the “Leaf” object, we need to access its properties in the timeline. Twirl-down the “Leaf” layer to show all properties that can be animated. For this aniamtion, we will focus on the “3D Scene Position.”


Step 8
Back in the 3D Panel, select the “Scene” layer and go to the Properties Panel. In the Properties Panel, select the Coordinate icon and change the “Y Angle” value to 360. This will rotate the scene around its Y-axis 360 degrees.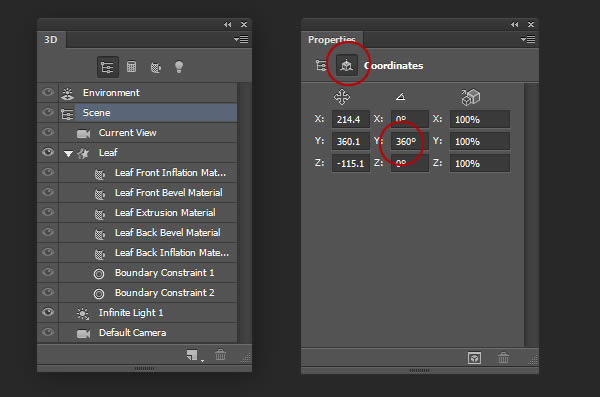
Step 9
Our goal is to have the “Leaf” object appear to continually rotate around its axis while only showing the front face of the object. To do this, we first need to make a copy of our “Leaf” layer. In the Layers Panel go ahead and copy this layer. Notice that a copy of this layer also appears in our timeline.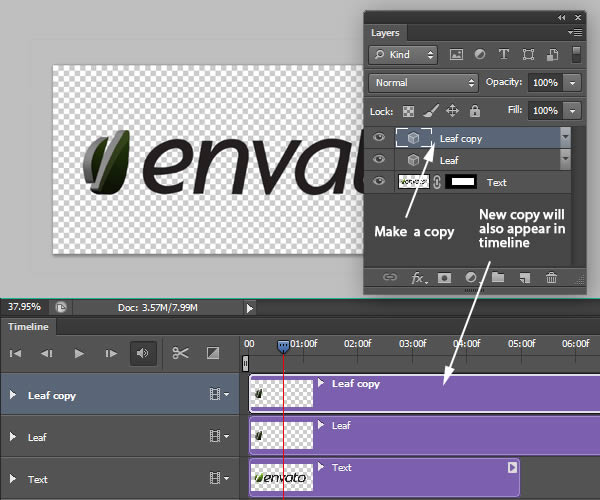
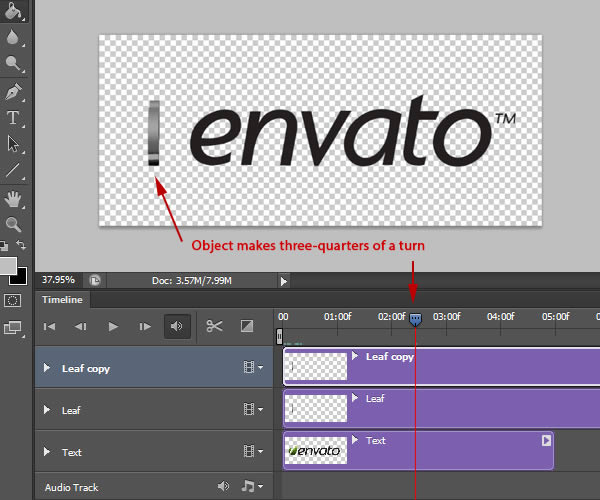
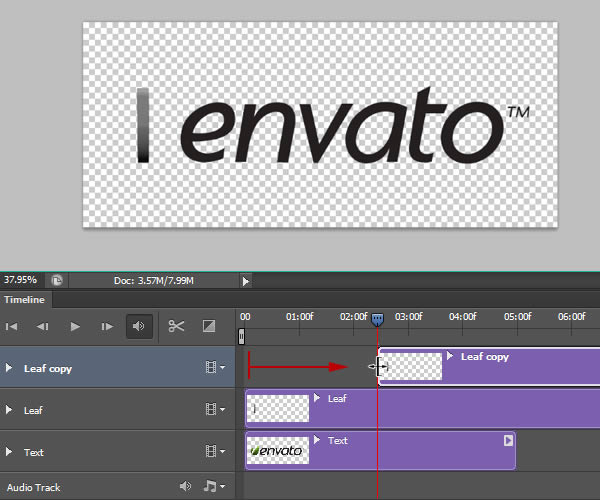
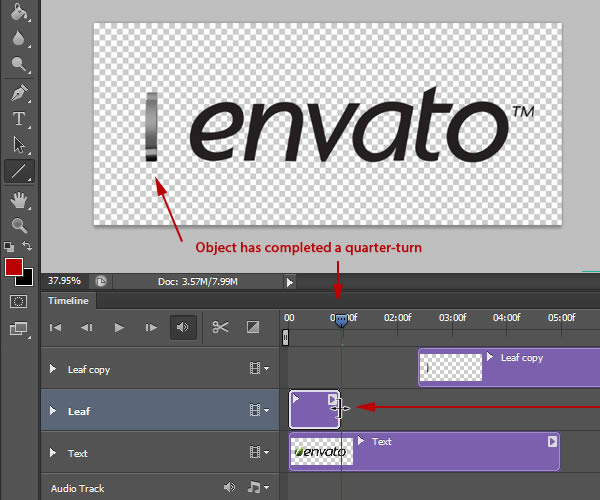
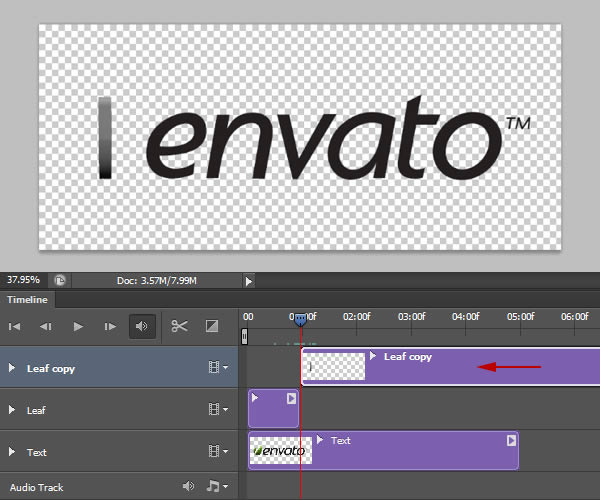
Step 10
Before we render any frames, we have to tell Photoshop which frames we want rendered. Use the Current Time Indicator to scrub through our animation to locate the point where our object appears to make a full rotation. Use the slider immediately below the timebar to set the end of the work area. Now, only these frames will render.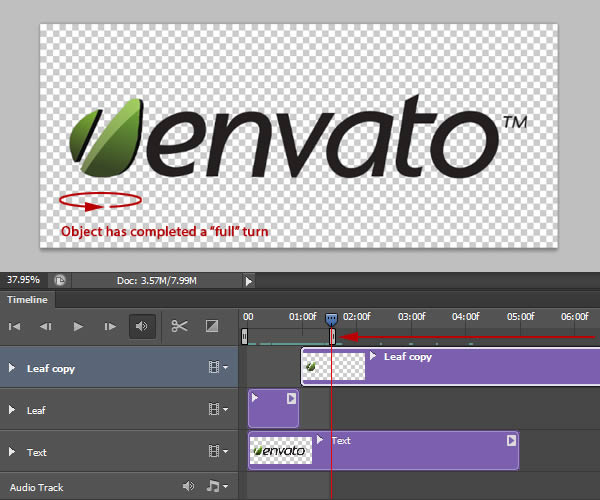
Step 11
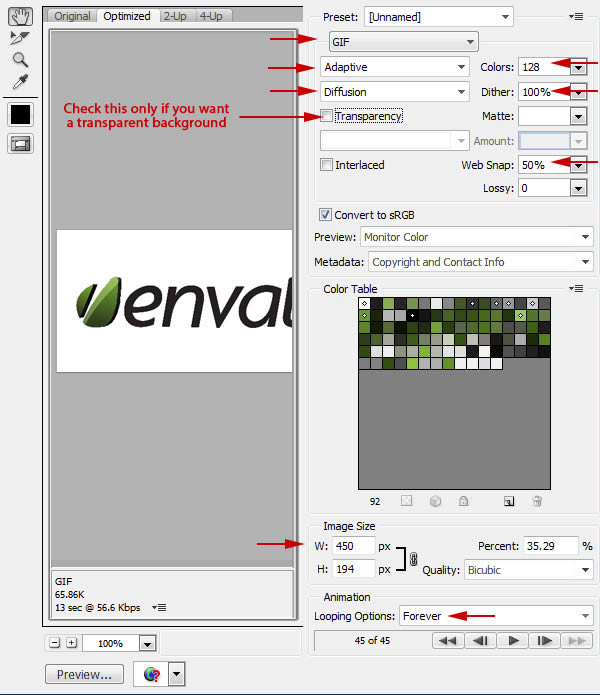
With our scene complete we can set up the final animated GIF. We will cover two options to save out our animation: Option 1 will quickly save out a low-quality GIF; Option 2 will take more time, but allow us to produce a high-quality GIF.The first option is to go to File > Save for Web. This option skips the rendering process and will save out the frames as they appear on our canvas. Go ahead and change the settings as you see fit. Click Save when done.

Step 12
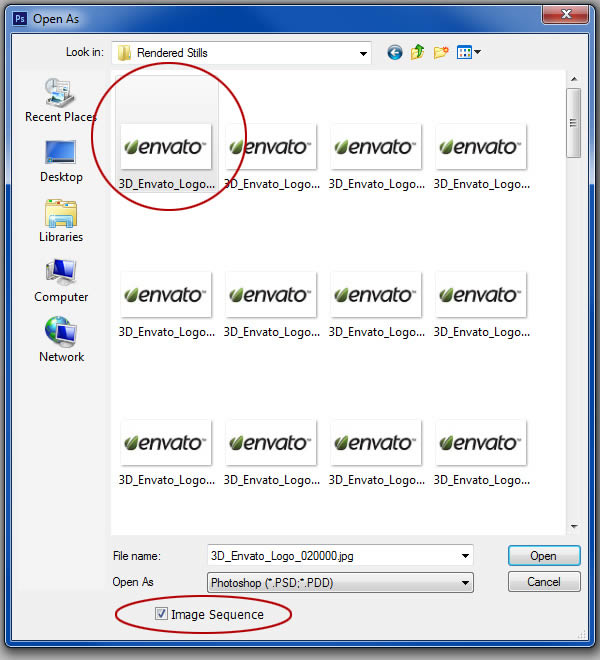
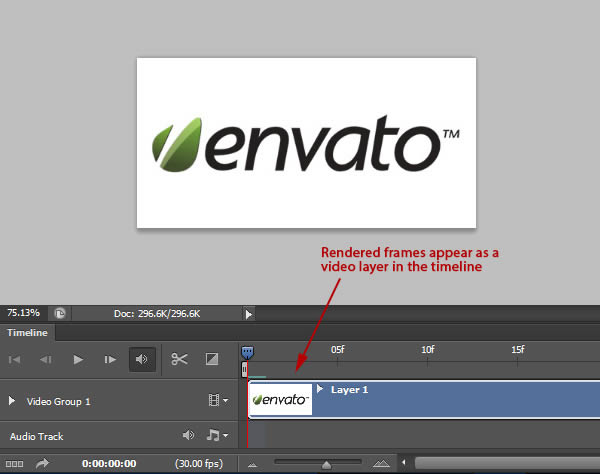
The second option will require our scene to be rendered first. It is highly recommended to save at this point. Now, go to File > Export > Render Video and make the changes as shown. Make sure to select “Photoshop Image Sequence” as the output. This will render our scene as individual frames.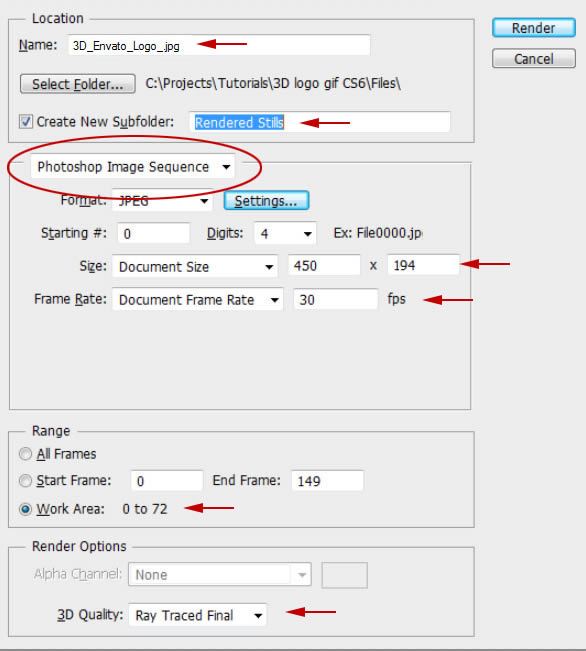
Final Rendering
The last step is to save out the animation as a GIF. Just repeat Step 11 and you’re done!.
No comments:
Post a Comment