by TopherW on Jul.09, 2009, under After Effects, Motion Graphics, Showcase, Updates, Visual FX
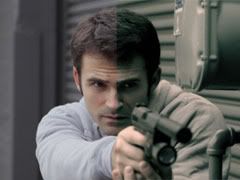
 Nick takes us through 3 different ways to render a character unidentifiable in an interview situation.
In the first instance, he uses an image mask in Final Cut Pro to colour correct the image and applies a pitch shift to change the voice.
In the second instance he uses a blur filter and an 8-point garbage matte to blur out the characters voice. He then shows you how to use the ‘paste attributes’ setting in Final Cut Pro to apply an audio effect created on a previous clip to this new clip.
Finally, he uses After Effects to motion track a number of black bars across the distinguishing features of his witness under protection.
After you click through over to ProJuice.org’s website, you can watch the tutorial in standard definition or high definition.


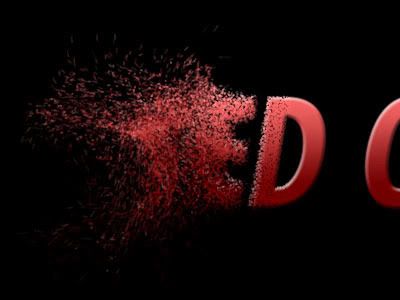
Three different ways to render your character unrecognizable.
Related Tutorials
74 Tutorials To Keep You Busy While I Am On Vacation
by TopherW on Jul.07, 2009, under 3D, 3D Stroke, 3DS Max, AEtuts.com, After Effects, Blender, Boris, CGtuts+, Cinema4D, Compositing, Form, Giveaways, GreyScaleGorilla.com, Houdini, Imagineer Systems, Keying, Matte Painting, Maya, Modo, Motion Graphics, Motion Tracking, Motionworks, Mudbox, NUKE, Particular, Presets, Project Files, Red Giant Plugins, Shine, Trapcode, Typography, Updates, Visual FX, XSI, ZBrush, videocopilot.net
I am going to be on vacation for a week after I get married on the 12th, so this should be able to keep you busy with whatever your needs may be. I promise when I get back there will be much more where this came from, as well as video blogs, more content and bigger and better stuff from me in general… so make sure you stay tuned and I will see all you sweet little lemondrops when I have a tan.
 I have seen a lot of written articles on this subject, and it seems to be a hugely popular effect. I mean some guy even did a roundup on the subject last week or so… anyways, I am going to be putting out the first of its kind, yes, the acclaimed Tilt Shift photography technique is possible with After Effects, and there is now a video tutorial for it. LINK HERE
 Hey everybody… have you ever gotten failed renders and error messages when you try to render out your high definition H.264 video in After Effects? I do all the time, and it is in part because the H.264 Output Module is not designed to render HD video. There is a separate workaround, that I get asked to explain all the time on forums. LINK HERE
 A lot of people ask questions on the forum, as to why their H.264 Quicktime videos look washed out and not as vibrant as they are with their source footage. Some people don’t really recognize the difference, and just take it as an problem that comes along with the compression codec, but that isn’t the issue. The issue is that Quicktime has a buggy little issue that stems from over/under compensating for different vibrancy on different displays. This has caused the problem, and now we have the answer. LINK HERE
 If you are not familiar with using the Constraint Tag, then head on over to Vimeo to watch this short tutorial as an introduction to the benefits of the Constraint Tag over the Target Tag. Hopefully it will point you in the right direction . . . Boom boom! LINK HERE
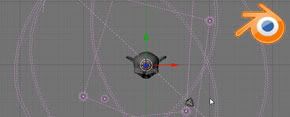
 Some of you were asking about a quick tutorial on how Nick set up last week’s Dynamics Test. Nick made this tutorial to show you the basic set up of how to get objects in your scene to bounce off each other. As you know, Nick has been a bit obsessed with dynamics in C4D all weekend. LINK HERE
 In this tutorial, Nick will go though the steps in texturing objects in Cinema 4D. He also plays with using textures to actually light the scene. He gets this specific tutorial request a lot and decided to just jump in and go though the process without too much set up or goal in mind. LINK HERE
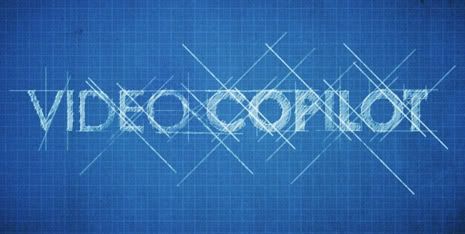
In this new tutorial, we’ll combine several techniques to self-animate a blueprint style logo right before your eyes. This fun technique uses basic built-in tools and can be used to ‘reveal’ a logo, a product or possibly a power tool. View Sample Video Watch Tutorial LINK HERE
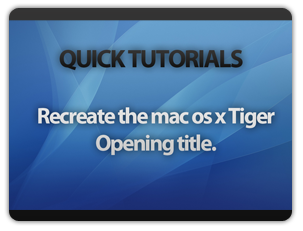 Thomas Hullin – Recreate the MacOSX Tiger Opening Title
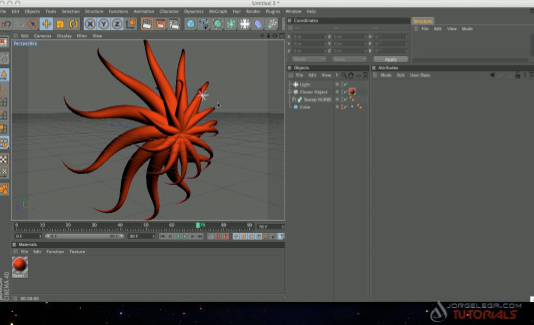
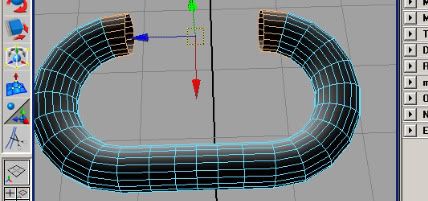
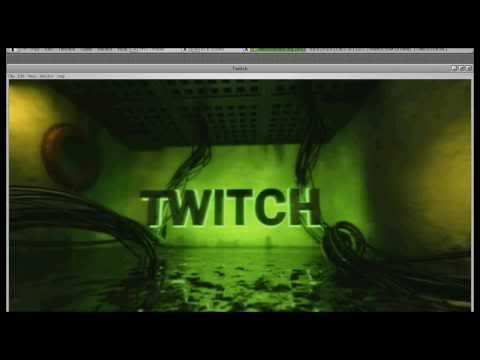 Recreating the Twitch Title’s Vines in Blender – 3 Part Series
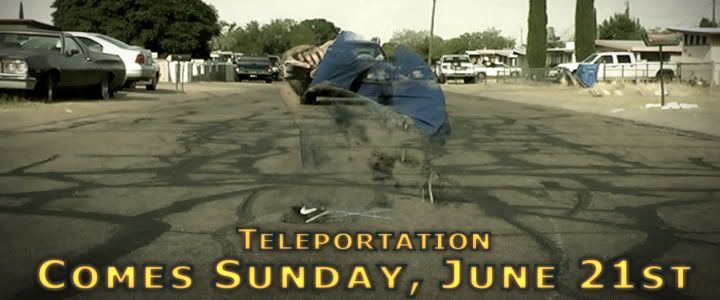 In this tutorial we will show you how to make is appear as though your actor is teleporting out of the way of a speeding vehicle using mattes, and extensive key framing. SD LINK HERE HD LINK HERE
 In this tutorial we show you how to model 3D Glass Shards in 3D Studio Max 9; and then composite them onto your footage using Adobe After Effects. SD LINK HERE HD LINK HERE
 In this tutorial we show you how to create the effect of Electrical Arcs coming out of your actors hands. We use basic motion tracking, 3D cameras, and Layer Compositing. SD LINK HERE HD LINK HERE
 FumeFX Crash Course By Evan Schaible
Lesson 1: Overview and Basics LINK HERE
Lesson 2: Sources LINK HERE
Lesson 3: Realistic Flame (S Source) LINK HERE
 Episode 23: Peel-Away Vortex Transition By Aharon Rabinowitz – In this episode of Red Giant TV, Aharon Rabinowitz shows you how to create an insanely cool transition for text and other elements. This tutorial builds on RGTV Episode 21, where Aharon covered a text-to-sand transition, so make sure to check it out. Read More | LINK HERE
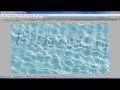
 In this presentation, Aharon Rabinowitz shows you how to create this ocean scene in Adobe After Effects with only the tools found in AE – No 3rd-party plug-ins were used. He’ll also introduce you to a cool plug-in for creating realistic water. This was part of a presentation he gave on June 25, 2009 at After Effects New York. n LINK HERE
 Cinema 4D’s Youtube Channel Videos:
Putting video footage onto objects in CINEMA 4D is popular. Here different clips are placed onto different sides of an animated video cube.
LINK HERE
 There are several ways to mirror objects in CINEMA 4D. One of the simplest is to use a scale of -1. This video shows how. Works great with hierarchies.
 There are several ways to add thickness to objects. One way is to use Explosion FX. The nice thing about this is that you can adjust the thickness later on if you change your mind about how thick it should be, whereas if you’ve added thickness via polygon modeling, it can take longer to adjust the thickness. LINK HERE
 When you have an object moving in an animation and you want the object to slow down, stop and stay still for a while, before it moves off again, you can run into an “overshoot” problem. This is when the object seems to shoot past where you want it to stop and it doesn’t stop properly. This is easily solved using the Clamp option. LINK HERE
 At first glance it can look like CINEMA 4D’s Boole Tool doesn’t do much in Union Mode. But it can be very handy when you are cutting two or more “cutting” shapes that overlap out of an object. Unless you union the shapes, you’ll probably find there is no cut where the two cutter shapes overlap. Union solves this. LINK HERE
 EverythingFX’s Making a Coin in Blender
 From Maltaannon.com – While rebuilding the DNA Chain project file from CS4 to CS3 I discovered that there are some things that make it easier. Interested? LINK HERE
 In this video tutorial, CreativeCOW leader, Eran Stern discusses the development process for the DVD. Eran also demonstrates his design methods using Boris Continuum Complete 6. LINK HERE
 In this 3ds Max 2010 tutorial, Michael Hurwicz looks at the new viewport label menus, which provide quicker access to some of the most common viewport-related functions, such as showing statistics, showing and hiding the grid, changing the view (e.g. front, back, perspective), and changing the shading mode (e.g. smooth and highlights, wireframe, edged faces).. LINK HERE
 In this 3ds Max 2010 tutorial, Michael Hurwicz introduces the new Graphite Modeling Tools, and in particular the “Generate Topology” feature, which allows you to quickly change the underlying structure of an editable poly to resemble bricks, tiles, diamond shapes, and a number of other options. The tutorial uses bricks as a demonstration of this capability. LINK HERE
 In this 3ds Max 2010 tutorial, Michael Hurwicz Michael Hurwicz looks at the new Particle Paint feature, which allows you to spray “particle seeds” on any object. You then use new operators in the Particle Flow system to convert these seeds to particles. The tutorial demonstrates “freehand painting” and uses the new “Birth Paint” operator to convert the seeds to particles. LINK HERE
 MaxAfter.com – 3DS Max LensFlare – Learn to create a very basic, yet powerful 3ds Max lens flare. We will use the lens effect of 3ds Max to produce a powerful lens flare. LINK HERE
 Taken from Rich @aeportal.blogspot.com – Via Strong Mocha are 2 video tutorials from Stephan Minning on the new version of his AE filter Normality 3, which was released last month. Minning speaks about the basics of setting up a composition with Normality in AE, along with the various light types, falloffs, and basic shading. Then he dives into rim lighting, toon shading, reflections, refractions, bump mapping, and lighting with a pre-rendered textured object.
Other options were discussed by Lutz Albrecht in his article on Adobe Developer Connection, Integrating 3D applications with After Effects – Part 1: Working with UV data. More background and links are in the AE Help doc Importing and using 3D files from other application. ARTICLE – LINK HERE
 Great Tip from Chad Smashley on Vimeo for detailing how to get VRay to render out multi-channel EXRs and how to get them into After Effects to read them. LINK HERE
 I really tried to throw Imagineer System’s Mocha a curve ball with this project but it was able to stick right with it!! I took a cheap handheld micro digital video camera and shot this short clip of a truck passing by. I then created a new side panel in Photoshop CS4, from a single frame of video and also made a “reflection map” from the background and put it all together using Mocha and After Effects. LINK HERE
 Create an Effect Inspired by the Bourne Ultimatum End Credits Sequence by Chaithanya Y In a very clever use of Trapcode Particular, this tutorial shows us how to create an effect that is inspired by the Bourne Ultimatum end credits sequence. LINK HERE
 Create a Radar Screen Logo Reveal by Eddie Bogdanov Using only built in plugins, learn how to create a radar screen which then reveals a logo. You will learn how to use 32-bit mode and few other tricks to simulate a real screen glow. LINK HERE
 Learn How to Rig and Animate a Character and Create your Own Odyssey Day 1 by Marcin Zeglinski – In this massive 2 part tutorial you will learn how to rig and animate a character using a combination of Illustrator, Photoshop and After Effects and create an incredible, cinematic odyssey piece. Part 1 covers pre-production techniques, workflow overview and creating and rigging the character. It also covers creating the star field background and creating the eye close-up. LINK HERE
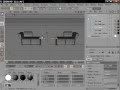
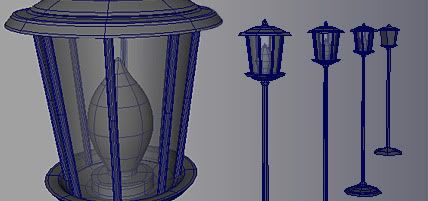
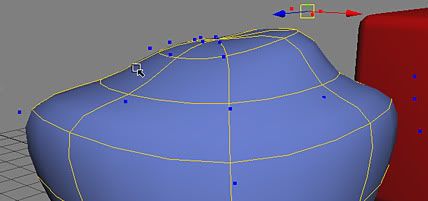
 Model a Stylish Eames Lounge Chair In 3ds Max by Martin Zeme In this tutorial we are going to model a 20th century design legend, the Eames Lounge Chair. The reason I chose this particular object are its different shapes and forms. It has both soft, organic pillows (with wrinkles) and a hard, defined structure that holds it all together, making it an excellent way to learn how to model both soft and hard structures. LINK HERE
 Create Amazingly Realistic Renders Using Advanced Render in Cinema 4D by Mountaga Kane Maxon’s 11th release of Cinema 4D introduces significant improvements to Advanced Render. AR 3 now uses two new algorithms (Irradiance and Quasi-Monte Carlo), making it much easier and faster to get clean, and beautiful renders than ever before. In this tutorial we will learn how to take advantage of these amazing new features! LINK HERE
 Advanced Edge Control and Texture Mapping in Blender by Pavel Palstsiuk There is no precise way to control the auto-generated edges in Blender, thus reducing the edge generation feature’s efficiency. You may, however, create and control your own edges, using multiple materials, and advanced UV mapping techniques. In this tutorial we will thoroughly explore this technique. LINK HERE
 ‘Quick Tip’ – How to Create Awesome Looking Imprints Using 3ds Max 2009 & Thinking Particles 3 by Cristian Pop In this tutorial, you will learn how to create realistic imprints, such as tire tracks or footprints, on surfaces like snow, mud, or other deformable materials. This technique can be used on a variety of objects, rigid or deformable, or even adapted into other interesting variations of your own! LINK HERE
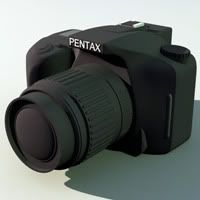 Model a Detailed, High-Poly Camera in 3ds Max 2010 by Corey Hayes This massive, 117 step tutorial covers the entire process of modeling a detailed DSLR camera, that would be suitable for use as a high-poly scene object in a render, or for generating normal maps to be applied to an in-game model. We will also be going over some of the ins and outs of 3ds Max 2010’s new graphite modeling tools! LINK HERE
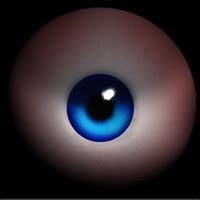 Model, Paint, and Animate a Realistically Stylised Eye In 3ds Max and Photoshop by Fabio Silva This is a multiple part video tutorial on how to create simple, yet effective, 3d eyes that can be used in either CG illustrations, or animations. This series of tutorials will cover all of the steps that are necessary, from modeling and unwrapping, to texturing, to rigging, and eventually animating the eye. LINK HERE
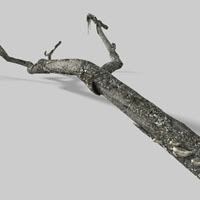 CG Award Winner ‘Fredi Voss’ Shows How to Make a Dead Tree Trunk in Cinema 4D by Fredi Voss In this tutorial, “CG Choice” award winner, Fredi Voss, will teach you how to model and texture a detailed, dead tree trunk, which could be used as a foreground object in a landscape, or even as a stand alone portfolio piece. LINK HERE
 @ Motionworks.com.au – In this recorded version of a recent Adobe E-seminar we walk through After Effects techniques and workflow for creating a grungy and moody boxing promo. Techniques include color grading for a poster-style look, creating an old, weathered look using stock images and blend modes and tips and tricks for creating organic looks. Watch Promo LINK HERE
 In this lesson we will learn how to use and animate a Sine deformer to create a snake animation. LINK HERE
 In this lesson we will learn how to use the Offset Edge Loop tool in Maya 8+.
LINK HERE
 In this tutorial we will learn how to use Maya’s Level of Detail feature to speed up our renders. LINK HERE
 In this lesson we will learn how to change the selection properties in XSI. LINK HERE
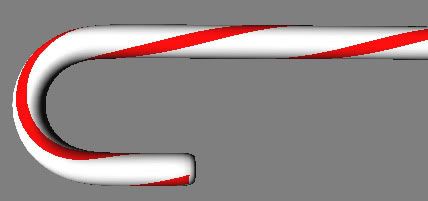 In this lesson we will look at how deformers can be used in XSI to create a candy cane. LINK HERE
 In this lesson we will learn about XSI’s powerful real-time shaders and how to build a fixed-function OpenGL shader. LINK HERE
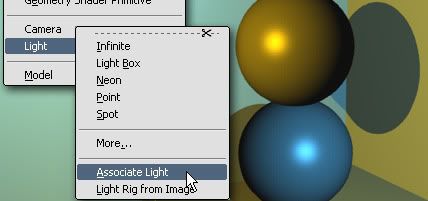 In this lesson we learn about some uses of light association in XSI. LINK HERE
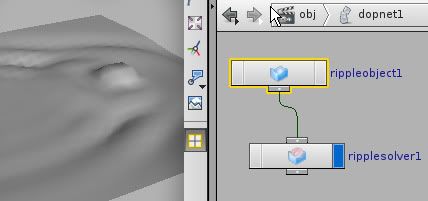 In this lesson we will learn how to build a ripple solver dynamics network. LINK HERE
 In this lesson we will learn how to set up particle instancing with a classic bee simulation. LINK HERE
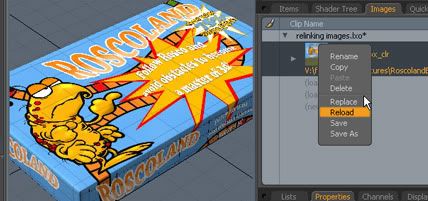 In this lesson we will learn how to replace images when the link to them has been broken and reload images that have been modified in Modo 301+. LINK HERE
 In this lesson we will learn how to use the Subtool Master which can help us speed up our workflow when dealing with multiple subtools in ZBrush. LINK HERE
 In this lesson we will explore more Subtool Master options including duplicating and mirroring subtools. LINK HERE
 Simulate Fire and Smoke Effects in FumeFX with 3ds Max
 3 Point Light Rig in Blender – LINK HERE
 Worm Head Speed Sculpt with Zbrush – LINK HERE
 How to create a 3D type effect using Cinema 4d and Photoshop – A new tutorial on how to create the following image using Cinema 4d and Photoshop. LINK HERE
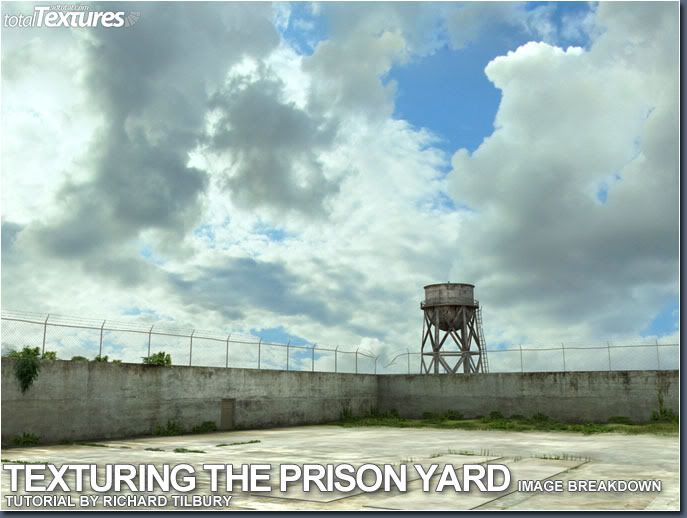 ‘The Prison Yard’ by Richard Tilbury is the featured image in this Total Textures Breakdown Tutorial.
 @ PVC – Learning how to navigate 3D space can be one of the more daunting features to tackle in After Effects. In this seventh video, we demonstrate how to use the Camera Tools in After Effects both to move 3D cameras, and how they affect the Position versus Point of Interest parameters. We also show how these same tools allow you to customize the additional 3D views the user has access to, making it easier to view your scene from alternate perspectives. Tips include how to quickly switch between the different tools, plus how to use… LINK HERE
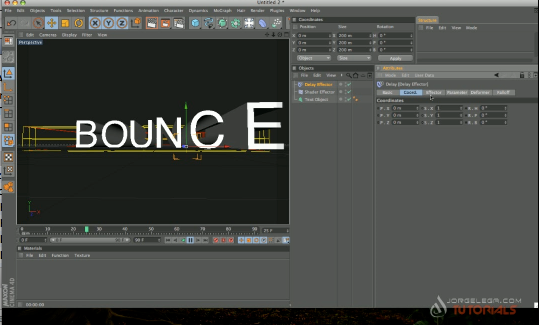 Mograph Delay Effector with Mograph Text Tutorial
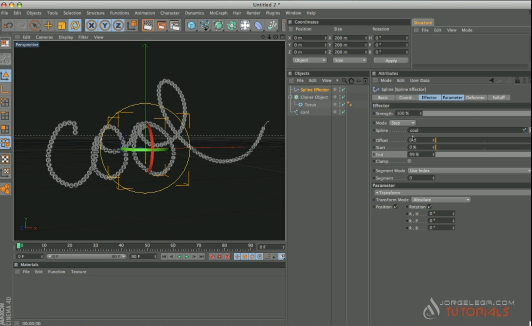 Mograph Spline Effector Tutorial
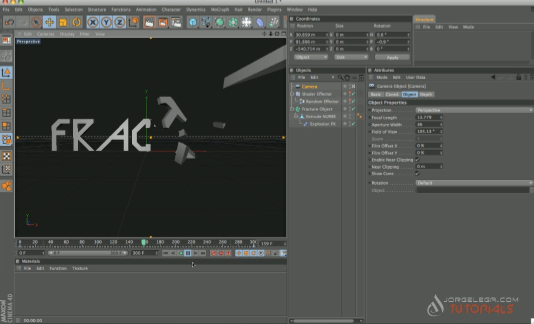 Mograph Fracture Tutorial
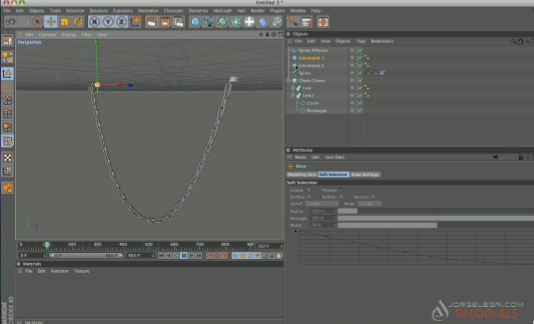 Check this tutorial on how to make a Dynamic Chain. You will need Cinema 4D 10 and the Mograph and Hair Modules. (fast passe Tutorial) LINK HERE
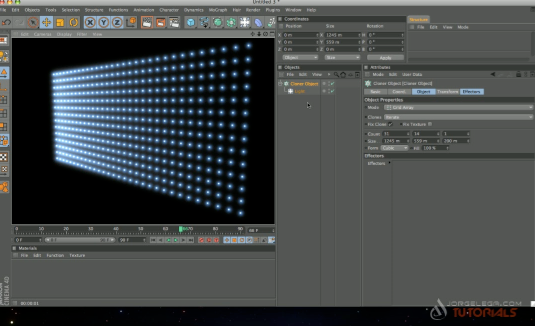 Mograph LED Lights Tutorial (No Audio)
 Tracer Using Mograph Tutorial (No Audio)
 2nd Tracer Using Mograph Tutorial (No Audio)
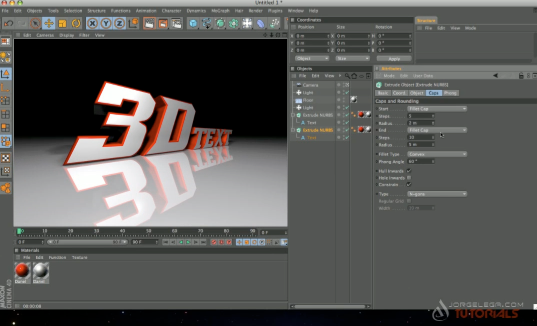
 3D Text Using Mograph Tutorial (No Audio)
 Flag Using Cloth Tutorial (No Audio)
 Basic 3D Text Tutorial (No Audio)
 Flying Gallery – Learn how to create a flying 3d image gallery using any collection of images you want, Use Trapcode particular to drive the simulation and wind to animate the images movement, fade images into the space using vanishing settings and deflect the elements to avoid flying through the camera. LINK HERE
 Animating Snotty The Snail – using our previously rigged version, we will learn to animate with simple techniques and processes, learn how to loop animation to allow for unlimited movment across any time range. Part 1 LINK HERE Part 2 LINK HERE
 Here I show you how to set up Mental Ray’s Physical Sun and Sky and I explain it’s main attributes. If you want to download my maya file for this setup click here. Follow the link to visit Max’s blog and download the script (mdTater.mel) that I use to create my random geometry. LINK HERE
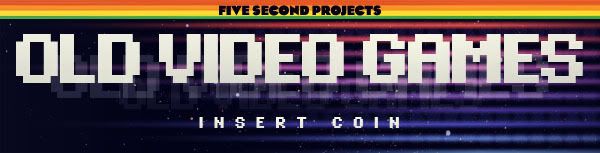 Welcome to an all new five second projects. This week’s theme is “Old Video Games.” Atari, NES, SEGA, Arcade. It doesn’t matter really. Just help us remember the good old days when Mario ruled the world and first person shooters weren’t around. Create a short project based on the theme and post it in the comments to be entered into the contest.
WHY YOU SHOULD ENTER! WATCH THIS!
How Do I Enter?
- 1. Create a five second animation based on the theme.
- 2. Upload your video to Vimeo. Don’t forget to add a link back to this blog post (the one after the jump on greyscalegorilla.com).
- 3. Post a link to this posts comment thread and Nick will add it to the Channel.
- 4. Deadline is July 13th
What Are Five Second Projects?
We all want to make cool shit for our reel right? Sometimes you just need a theme to get you started… Some rules to fight against. Use the theme “Old Video Games” to make a five second motion piece and link it in the comments of this blog post. “Shout Box” submissions will not be found and will not be added to the channel. Please be sure to post a link in the contest’s post’s comments to ensure Nick seeing it.
It’s really great to see so much participation. Tell a friend about the five second projects and get them involved too. Don’t forget to push yourself to try something new every week. What about a new piece of software or technique you have wanted to try? Take control of your creative output and Make Cool Shit!
Use the Day To Learn Something Sweet #aftereffects #cinema4d #3d #tutorials
by Topher on Jun.25, 2009, under 3D, 3D Stroke, 3DS Max, AEtuts.com, After Effects, Apple Color, Apple Motion, Blender, Boris, CGtuts+, Cinema4D, Compositing, Contests, Form, Fusion, GreyScaleGorilla.com, Horizon, Houdini, Keying, Maya, Modo, Motion Graphics, Motion Tracking, Motionworks, Mudbox, Particle Illusion, Particular, Photoshop, Presets, Project Files, RealFlow, Red Giant Plugins, Shake, Sound Keys, Starglow, Toxic, Trapcode, Typography, Updates, Visual FX, XSI, ZBrush, artbeats, videocopilot.net
 Jerzy Drozda Jr. aka Maltaannon finally published Mataannon 2.0! Its been a long time coming, but he posted his tutorial for creating the Form Face from Making It Look Great 5. LINK HERE
 Episode 22: Creating a Summer Blockbuster Film Look By Stu Maschwitz - In this week’s episode, Sin City’s Visual Effects Supervisor – and our new Creative Director – Stu Maschwitz, shows you how to get the Summer Blockbuster look seen in Transformers 2, Terminator: Salvation, and The Taking of Pelham 1-2-3. Read More | Watch Video Product(s) Used: Magic Bullet Colorista, Magic Bullet Looks LINK HERE
 In this tutorial, Nick goes though the process of modeling, animating and lighting an animation he did for a Five Second Project called “Balloons In Black And White.” Follow along in Cinema 4D as he uses particles, HDRI lighting and reflective textures to create this scene. LINK HERE
 Other Stuff From Nick lately:
Six Reasons Why You Should Join 5 Second Projects
How to Install CSTools in C4D R11
Why I Became a Photographer
Five Best Cinema 4D Training Sites
 Create an Elegant Concentric Rings Animation by Satya Meka Inspired by the work of Mark Coleran. Satya shows us how to use iterations of simple shape layers to create some beautiful procedural art. UPDATE: Responding to readers requests, Satya recreated the effect in Cinema 4D and has create a bonus addendum tutorial which in true Satya style is full of XPresso goodness. LINK HERE
 Heads Up on Some Cool Graphic Type Techniques by Markus Gustafsson In this tutorial, regular Aetuts+ author Markus Gustafsson shows us how to use adjustment layers and expressions to create some edgy graphic design. LINK HERE
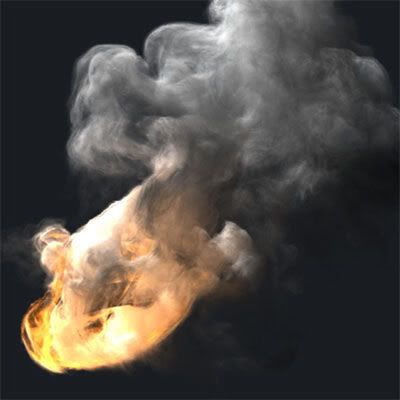
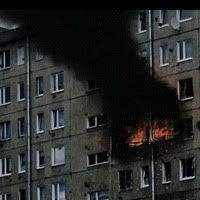 Create a Burning Building VFX Shot by Eddie Bogdanov Starting with nothing more than a few still photographs, learn how to create this dynamic burning building VFX shot. LINK HERE
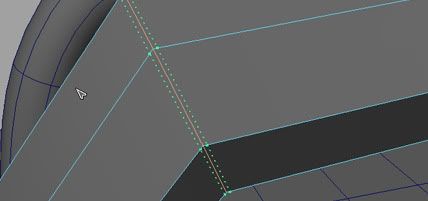
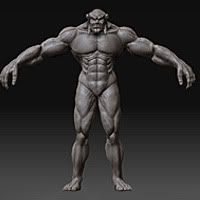 Model, Sculpt and Texture a Demon-like Monster in 3ds Max and ZBrush – Day 1 by Mehdi Pourshayegan This is a multi-part tutorial on creating a Demon-like ‘Lok Warrior’ with realistic muscle anatomy. In the first day of this tutorial we will create a base mesh for our character using poly modeling. In day two we will take this mesh into ZBrush and sculpt intricate muscle anatomy. On day three we will texture the creature and add the finishing touches to the artwork. Let’s begin day 1 of this tutorial. LINK HERE
 Model, Sculpt and Texture a Demon-like Monster in 3ds Max and ZBrush – Day 2 by Mehdi Pourshayegan This is a multi-part tutorial on creating a Demon-like ‘Lok Warrior’ with realistic muscle anatomy. In the first day of this tutorial we created a base mesh for our character using poly modeling. Today we will take this mesh into ZBrush and sculpt intricate muscle anatomy. On day three we will texture the creature and add the finishing touches to the artwork. Let’s begin day 2 of this tutorial. LINK HERE
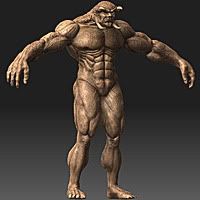 Model, Sculpt and Texture a Demon-like Monster in 3ds Max and ZBrush – Day 3 by Mehdi Pourshayegan This is a multi-part tutorial on creating a Demon-like ‘Lok Warrior’ with realistic muscle anatomy. On the first day of this tutorial we created a base mesh for our character using poly modeling. On the second day, we took the mesh into ZBrush and sculpted the intricate muscle anatomy. Now today we will texture the creature and add the finishing touches to the artwork. Let’s begin day 3 of this tutorial. LINK HERE
 Create a Spectacular Crash Animation With Maya Dynamics – Day 1 by Alex Engelmann It is always great to learn new animation tools and techniques that can help you to bring your creations to life. In this tutorial we will learn how to use Maya’s powerful animation, dynamics, and camera tools to create an explosive crash effect between two vehicles. This is Day 1 of a multi-day training series on Maya Dynamics. LINK HERE
 Create a Spectacular Crash Animation With Maya Dynamics – Day 2by Alex Engelmann It is always great to learn new animation tools and techniques that can help you to bring your creations to life. In this tutorial we will learn how to use Maya’s powerful animation, dynamics, and camera tools to create an explosive crash effect between two vehicles. This is Day 2, the final part of this multi-day tutorial on using Maya dynamics. LINK HERE
 ‘Quick Tip’- How to Create a Shaky Camera Effect in Blender by Karan Shah Camera handling is one of the most important parts of animation. Using an arsenal of little camera effects and tricks, we can achieve very dramatic results. In this tutorial we will learn a few camera handling techniques to make our animations more believable and have a greater impact on the viewer. We will also learn a bit about Blender’s particle systems too. LINK HERE
 Adding Anticipation to your Animations in Maya 4.0+ – In this lesson we will learn about anticipation – one of the 12 principles of animation. LINK HERE
 Interactive Primitive Subdividing in Maya 8.5+ – In this lesson we will learn how to modify the number of subdivisions of an object during its interactive placement. LINK HERE
 This tutorial shows using the Input Box to transform, rename, or select multiple objects quickly in Maya 8.5+. The Input box is a great alternative to the Channel box for modifying objects because its location on the status bar makes it easily accessible. LINK HERE
 In this lesson we will learn how to use the bridge tool in Maya 8.0+ and explore some if its uses. LINK HERE
 In this lesson we will learn how to change XSI’s camera movements to mimic Maya’s. LINK HERE
 In this lesson we will explore the Keying Panel, which is XSI’s version of the Maya’s Channel Box. LINK HERE
 In this lesson we will learn about XSI’s Schematic view and its similarities with Maya’s Hypergraph. LINK HERE
 In this lesson we will learn how to use the Ruler Tool and Protractor Tool to measure the distances and angles in modo 301+. LINK HERE
 Projection Painting in Blender – LINK HERE
 Blender 2.5 Overview – LINK HERE
 Model and Texture a Wooden Barrel in Blender – LINK HERE
 Bake Zbrush Material into a Texture Map – LINK HERE
 Create a Night Sky with Twinkling Stars in 3ds Max – LINK HERE
 Noise Junkies – There is a new tutorial available now at the TUTORIALS page. It teaches you how to make a basic piano in Cinema 4D. Enjoy. LINK HERE
 Our latest 3dsmax tutorial ‘Joy Tree’ is brought to you by Weiye Yin. LINK HERE
 ‘Flattening Out, Cleaning Up & Mixing Shapes’ are the latest set of blender video tutorials by Jason Welsh. LINK HERE
 Tutorial: Outer Space Galaxy with Fractal Noise- This tutorial uses the always handy fractal noise plug-in to create different elements in an outer space scene. Space gas, planets, and star fields originate from this handy plug-in and with the right settings you have a nice looking galaxy environment that you could move a camera through if you so choose. LINK HERE
 This is a quite, easy method for creating some fake 3d text and place that “fake” 3d text at the bottom of the ocean for an impressive opening title slate. I’m sure after watching this tutorial you will see just how useful this technique can be. Remember, don’t stick EXACTLY to what I do… experiment, experiment, experiment! LINK HERE
 On MacBreak Studio I talk with Alex Lindsay about using the Replicator to animate a deck of playing cards. See it on iTunes here or on the web LINK HERE.
 On MacBreak Studio, I talk with Alex about how to create a 3D environment in Motion and animate a camera inside it. Learn how to do the whole thing in 8 minutes. See it on iTunes here or on the web here. And to give credit for the inspiration for this project design: Andrew Kramer’s outstanding site for After Effects videocopilot.net. LINK HERE
 I return to MacBreak Studio and talk with Alex about creating extruded 3D objects in Motion using Zaxwerk’s ProAnimator. See it on iTunes here or on the web here. LINK HERE
 return to MacBreak Studio, where I talk with Alex Lindsay about wondertouch’s particles for Motion. Watch on the web here or on iTunes here. LINK HERE
 Here is a quick tip on using Preserve Transparency in After Effects. An often overlooked feature, this little switch can sometimes be very useful when wanting to stack several layers and retain the transparency of the bottom layer. Head on over to Vimeo to watch this in HD LINK HERE
 Create “dynamic sparkles” which adhere to the highlight features of an element… Use fractal noise for controlling the dynamics of the sparkle element… Give an animated sheen to an element using masks and animation… LINK HERE
 An introduction to the power of RPF and RLA files and how they can be used in post…. Render from any 3D application and embed various channel information to be used in compositing software… Learn how to create depth-of-field effects, without the render overheads… PART 1 LINK PART 2 LINK
 Create a Double Sides Shader in Maya -
In this tutorial I show you two ways of creating double-sided shaders in Maya. LINK HERE
 In this tutorial I cover the basics of Maya’s Paint Geometry Tool. Many times have i had to add ice or drops of water to bottles pretty much one by one by hand, but no more!! This can be very useful when adding things as rocks to a terrain or really anything that needs to be duplicated and randomized on any given geometry. LINK HERE
 Creating Studio Lighting in Maya – Edit: To download the scene file click here. LINK HERE
 In my FIRST EVER video tutorial, I’ll be showing you how to create a UFO in Cinema 4D. This is the same technique I used in the final trailer which can be seen at PrettyPeoplePictures.com/Insurgents. LINK HERE

Welcome to Green Soda’s FIRST EVER VFX Challenge!! This challenge is sponsored by RIBBIT FILMS, enter and you could win one of their DVD Suites!
For this month’s challenge I give you complete freedom so let ALL your creativity run free!! This challenge’s theme is “Fake Promo”.
Choose any product you feel would be fun to make a TV spot for and go for it! All submissions must be NO LONGER than 15 seconds, if your entry is kickass being only a few seconds long that is just as good!! No need to go the full 15 seconds…
If you decide to enter the contest let me know by posting a comment in this article’s comment section below. This way I can keep track of who is participating and post a list providing a link to all of your WIP threads. No, WIP threads are not mandatory to enter the contest but they definitely make it easier and more fun to interact with other participants. Check the rules for more details.
When you are done with your entry simply upload it to VIMEO and email me the link or post it in the comments section so I can find it. Once I receive it I will add it to the challenge’s VIMEO channel where all entries will be posted.
Information on how the winner is chosen can be found here.
The deadline is July 25th so get to work! ![]()
Make sure you read the challenge’s general information if you haven’t done so already. If you still have questions post them here or email me at: avillabon [at] gmail [dot] com
GOOD LUCK!!!
HUGE WEDNESDAY POST!
by TopherW on Jun.17, 2009, under 3D, 3D Stroke, 3DS Max, AEtuts.com, After Effects, Blender, Boris, CGtuts+, Cinema4D, Compositing, Contests, Flame, Form, Giveaways, GreyScaleGorilla.com, Houdini, Imagineer Systems, Matte Painting, Maya, Modo, Motion Graphics, Motion Tracking, Motionworks, Particular, Photoshop, Presets, Project Files, Red Giant Plugins, Reviews, Shine, Showcase, Smoke, Sound Keys, Starglow, Trapcode, Typography, Uncategorized, Visual FX, XSI, ZBrush
 Nuke: Intermediate CG Pipelines: (4 chapters) Chap 01- CG Multipass compositing in Nuke: In this first chapter, we will focus in the use of multipass renders from 3ds Max (VRay) and Maya (Mental Ray) inside Nuke, showing the basic setup inside the 3D application to output a EXR multipass file and how to composite them back, pass by pass until we achieve a correct and accurate match to the RGB render. LINK HERE
 HEROES – Chapter Style – In this tutorial we will show you some advanced ways to apply text to your productions like you would see at the beginning of every Heroes Episode.
Watch Tutorial in Standard Definition Watch Tutorial in High Definition
Tutorial Page LINK HERE
 AE Quicktips #8: Camera RAW Sequences -
In this video tutorial, Creative COW contributing editor Carl Larsen shows you how to import a .jpeg or .tiff sequence into Adobe After Effects with Adobe Camera Raw development settings applied.
Podcast Hosted by Carl Larsen LINK HERE
• Part 2 of the 3ds Max Particle Flow tutorial of controlling the bullets
• We will explore features like Find Target, Spawn etc. in PF of 3ds Max
LINK HERE
 GreyScaleGorilla.com – How to Work Faster in AE
Nick Campbell has a workflow – speedup video for all you to enjoy!
LINK HERE
 GSG – How to Use Simple Shapes and Masks to Make an Entire Animation-
In this tutorial, Nick goes though the process of using masks to animate simple shapes. Then, using precomping and simple plugins, we warp and distort the simple shapes into our final animation.
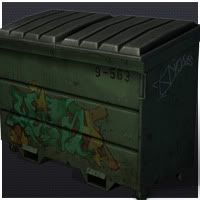 How to Create a Video Game Dumpster: The Complete Current-Gen Workflow by Kaleb Aylsworth – As technology evolves, the tools and requirements for creating current-gen game art are constantly changing. In this tutorial we will learn the current game art workflow in its entirety, from the low-poly model all the way to final game-ready asset. We will create a realistic grimy dumpster suitable for any urban setting. This mammoth video training series features over 194 minutes of video instruction on all aspects of game art creation, including creating the low-poly and high-poly models, the UVW unwrap, baking normal maps from high-poly, and creating diffuse, specular and detail bump textures. LINK HERE
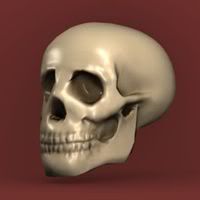 Sculpt, Model and Texture a Low-Poly Skull in Blender by Karan Shah – Normal maps are widely used in games to make low poly models look high poly. In this tutorial you will learn how to create a high res Skull model, generate a normal map from that model and learn how to apply this to its low poly version. Techniques covered in this tutorial include multires sculpting, baking a normal map, baking ambient occlusion and applying the maps to a low poly model. LINK HERE
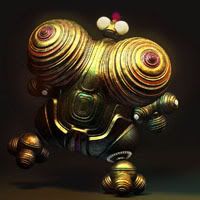 Model a Venus-styled Robot in Cinema 4D by Peter Hofmann (aka peXel) – In this tutorial you’ll learn how to model and texture a small robot from scratch and place it in a lit scene. This is a comprehensive tutorial with 127 steps and will provide a complete introduction to making 3D art for the intermediate to advanced Cinema 4D user.
 Build a Reusable Light Rig in Maya by Alex Engelmann – In the visual world of CG, presentation is nearly as important to the final result as the artistic piece being presented. For this reason lighting tools and techniques will always be indispensable assets to your artistic toolset. In this tutorial you will learn how to setup a basic lighting rig in Maya. Specifically, this tutorial covers Lighting, Cameras, Render Settings, and some basic touch-up techniques in Photoshop. Once you’ve completed this tutorial, you will have a light rig that you can use to quickly render out professional quality images of your model. LINK HERE
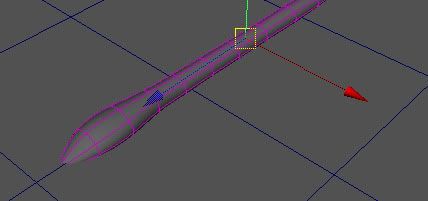
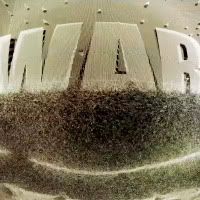 War! Or How to Create a 3D Particle Generated Video Display - by Wes Kandel
Wes comes back with another adrenalin fueled piece that is sure to become an Aetuts+ favorite. Using Trapcode Form as the basis to display video, he shows how to use the audio reactors built in to form to achieve something very very cool.
LINK HERE
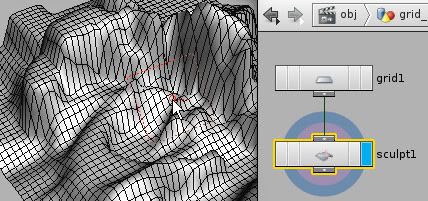 In this lesson we will learn how to change geometry with the Sculpt tool. Accessing the Sculpt tool, Learning different sculpt operations, Using bitmap data. Uses Houdini 9+
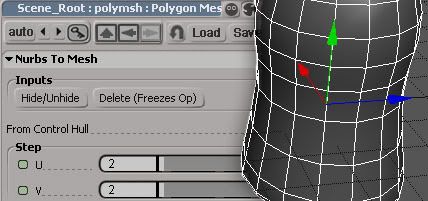 In this lesson we will learn how to convert NURBS surfaces into Polygons in XSI. Uses XSI 4.2+
 In this lesson we will learn how to create a low resolution Cage for a rigged model to remove lagging within our scene as it is animated. Uses Maya 8+
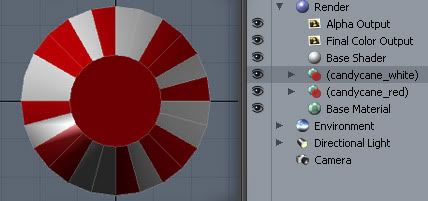 In this lesson we will learn how to use modo’s selection tools and deformers to build a candy cane. Uses Modo 301+
 CGCOOKIE- Creating Magic Wand Effects in Blender Part 1 and Part 2 -
 ZBrush to Maya with Decimation Master
An overview of the new ZBrush to Maya/Max/XSI rendering pipeline with the new Decimation Master plug-in from Pixologic.
 Yeah! A new tutorial has been added to Sketchy Pictures! “Rolling out the Red Carpet” tutorial takes you through Cinema 4d and shows you how to recreate a carpet roll with text. Trust me it’s a really cool effect. Don’t believe me, well jump on over the tutorial page and take a look at the preview movie, I’m sure you’ll enjoy this one! LINK HERE
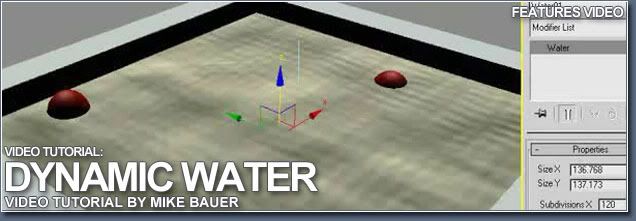 Mike Bauer shows us how to quickly animate a cool water effect in our latest 3dsmax video tutorial. LINK HERE
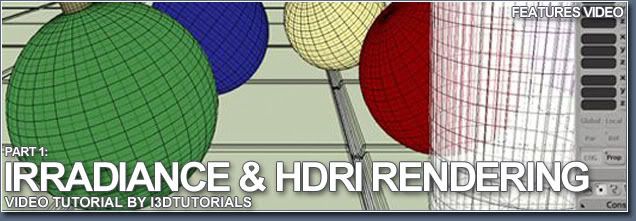 XSI Video Tutorial ‘Rendering with Mental Ray’ is the latest video tutorial by i3D Tutorials. LINK HERE

Welcome to an all new five second projects. This week’s theme is “Kick The Bucket.” Create a short project based on the theme and post it in the comments to be entered into the contest.
More Prizes? Holy Crap!
Yep, Enter your Five Second Project and you could win a copy of Making It Look Great 6 from Motionworks and Tim Clapham. This is a great training series that goes though an entire project workflow from Cinema 4D to After Effects.
How Do I Enter?
- 1. Create a five second animation based on the theme.
- 2. Upload your video to Vimeo. Don’t forget to add a link back to this blog post.
- 3. Post a link to this posts comment thread and I will add it to the Channel.
- 4. Deadline is June 29th
What Are Five Second Projects?
We all want to make cool shit for our reel right? Sometimes you just need a theme to get you started… Some rules to fight against. Use the theme “Kick The Bucket” to make a five second motion piece and link it in the comments of this blog post. “Shout Box” submissions will not be found and will not be added to the channel. Please be sure to post a link in this post’s comments to ensure Nick Campbell seeing it.
It’s really great to see so much participation. Tell a friend about the five second projects and get them involved too. Don’t forget to push yourself to try something new every week. What about a new piece of software or technique you have wanted to try? Take control of your creative output and Make Cool Shit!
Check out the entries at the Vimeo Channel…
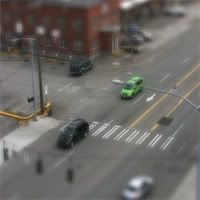
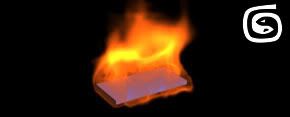
ProJuice.org Heat Haze in After Effects
by TopherW on Jun.16, 2009, under After Effects, Motion Graphics, Visual FX
 To make the heat haze effect was basically a 3 step process.
 Firstly Nick created a layer of fractal noise that evolved over time using an expression. Then used this layer as a displacement map for my main piece of footage. This essentially created the wavering, blurry look of a heat haze.
The second step was creating the watery reflections you often see in the forground. For this Nick used a range of masks, scaling and blend modes, along with a bezier warp.
The final step was colour correcting to make the warm reds and oranges associated with shooting in hot conditions.
As this tutorial is a little bit more involved than some of others, we have included a higher resolution version to stream. It might take a little bit more bandwith to watch though!! LINK HERE

Related Tutorials
Big Roundup Big Stuff
by TopherW on Jun.09, 2009, under 3D, 3DS Max, AEtuts.com, After Effects, Apple Motion, Blender, Cinema4D, Compositing, Form, Houdini, Keying, Matte Painting, Maya, Modo, Motion Graphics, Motion Tracking, Motionworks, Particle Illusion, Particular, Presets, Project Files, Red Giant Plugins, Shine, Trapcode, Typography, Visual FX, XSI, videocopilot.net
 Okay if you are wondering where I have been the last week… you can check out a few different places to get the inside scoop on me:
Yeah, I gotta ton of stuff going on, so if you want to check out what I have been up to hit up all four of those, and hey, you might even win a prize!
The new tutorial from Video Copilot… DVD Menus with Encore. Learn how to make loopable DVD Menus with some cool effects.
LINK HERE
 Text Effects with Set Matte
In this tutorial you’ll learn how to use the Set Matte effect with other effects like Fractal Noise, Glow, and TriTone to can create some incredible text effects!
MaxAfter.com – Bullet Control Part 1
Part 1 of the 3ds Max Particle Flow tutorial of controlling the bullets, First we will use some easy techniques to model this gun.
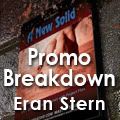
 Crime Avenue by Eran Stern of Stern FX (www.sternfx.com)
Eran Stern’s newest video tutorial, Crime Avenue, mixes ordinary city aerials with unique, computer generated clips to create a dynamic TV Promo. Eran employs the 3D tracking capabilities of Pixel Farm’s PFHoe to give this After Effects project a truly advanced look that’s easy to achieve. LINK HERE
Paint Strokes Morph June, 2009 new!
Using paint strokes brushes to automatically morph between path shapes. LINK HERE
 In this episode of Red Giant TV, Aharon Rabinowitz shows you how to use Trapcode Form to create the effect of text (or a logo) dissolving to sand and blowing away. You’ll also learn how to reverse the transition, so that sand forms into text. You can see an example video of the end result here.
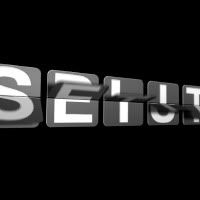 Create a Split-Flap Type Display Jun 1st in Motion Graphics by Mattias Peresini – Split-Flap-What? It’s the term used for displays that are found in train stations and airports, where they typically display departure and/or arrival information and do that cool flipping of letters to display the new information. This tutorial does not show how to create the effect from scratch but instead it is a tutorial to explain how to use the project file created by Mattias Peresini who runs the totally awesome mattrunks website which has incredible tutorials for After Effects in French. We are very happy to have Mattias doing his first English tutorial for us here at Aetuts+. LINK HERE

Create a Surprising Billowing Cloth Reveal Jun 3rd in Motion Graphics by Lloyd It’s amazing how much pseudo-3D you can do in After Effects today. This tutorial will focus on using a new plugin that brings 3D bicubic deformations to layers that allows you to truly bend and twist layers in 3D space. If you are familiar with 3D packages, this is true displacement as opposed to just bump mapping. LINK HERE
 Create a Sci-Fi Movie Title Sequence Jun 8th in Motion Graphics by Michael Park This tutorial covers the creation of a space-like si-fi title sequence from scratch. Michael shows us how you can easily create a visually interesting and impressive title animation with some simple title cards and text animation. The tutorial uses the Twitch plugin from Video Copilot, though a similar effect could be obtained by manual keyframing. LINK HERE
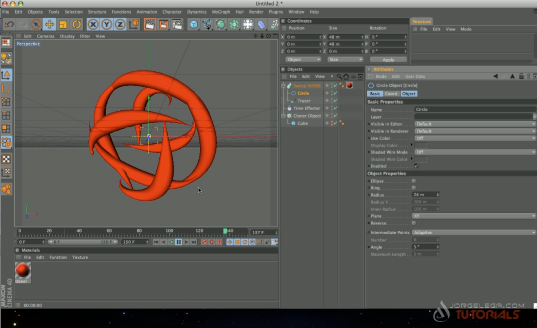
 In the final part of this series we’ll look at how to add some more detail to the shatter in Cinema 4D using the Knife tool, add dust in Adobe After Effects using Trapcode Particular, create a quick background and fake refraction using the Displacement Map effect. After adding the Particle Null, right click the layer and choose Cinema 4D Tags > External Compositing. This will ensure the null is available in After Effects. LINK HERE
 In this lesson we will learn how to use the ViewCube in Maya 2008+
 In this lesson we will learn how to parent in the Hypergraph and parenting options in the Move tool in Maya 2008+
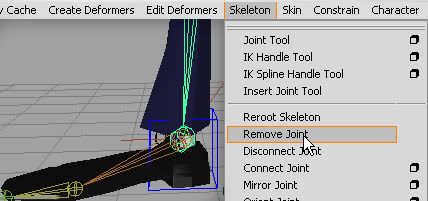
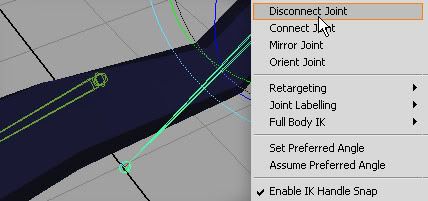 In this lesson we will learn how to disconnect joints within a skeleton without having to detach the bound mesh in Maya 2008+
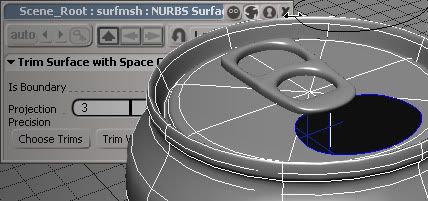 In this lesson we will learn how the Trimming tool can be used to punch holes into NURBS meshes in XSI 4.2+. Trimming is an effective way to create complex NURBS geometry quickly. Once you learn this technique, you have much more control over your NURBS meshes. LINK HERE
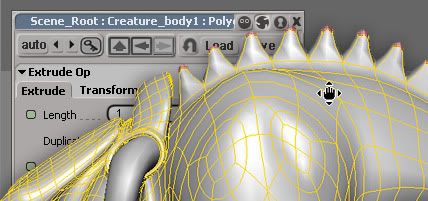 In this lesson we will learn how to extrude multiple non-merged faces in XSI 4.2+. When modeling with polygons, you sometimes need to extrude a continuous row of faces, without having them all merged together. This technique is useful for making bumps on a dinosaur’s back, a serrated knife blade, or a spiked mace head. You can create interesting geometry using this technique. LINK HERE
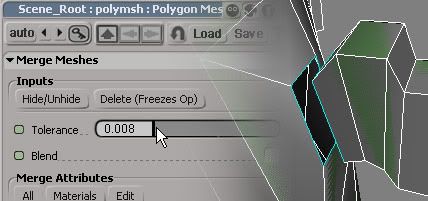 In this lesson we will learn how to merge separate polygon surfaces into one unified mesh within XSI 4.2+. This is a useful technique for reusing your geometry and then merging it back together for texturing. LINK HERE
 In this lesson we will learn how to use the Flare effects in XSI 4+ to reproduce Lens Flares. Lens Flares are traditionally the bane of photography, as they can ruin good photos and footage. In XSI that isn’t a problem but it is a reproducible effect. Try adding a Lens Flare to your next render for creating a neat lighting effect. LINK HERE
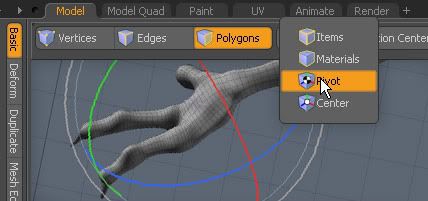 In this lesson we will learn how to change the point around which we rotate an object in Modo 301+
 In this lesson we will learn how to use gradients and input parameters to quickly texture an alien pod based on its displacement height in Modo 301+
 Here is a great new tutorial on using particleIllusion 3.0 to create the transport effect from the new Star Trek movie.
 Episode 20: Creating a 3D picture Montage with Trapcode Particular By Rob Birnholz – In this Episode, Rob Birnholz shows you a great technique for quickly creating a 3D picture montage with Trapcode Particular. It takes just minutes to set up, but can save you hours of work. Read More | Watch Video | Comment
 ‘Get Into Blender! Introduction, Menus & Views, Navigation & Components’ is the latest set of video tutorials for Blender by Jason Welsh
 Mike Bauer brings us another 3dsmax video tutorial where he shows us how to create a basic mesh which will help you to quickly model characters.
 LINK HERE


HWC’s VFX For Directors WINNER #1
by TopherW on Jun.02, 2009, under 3D, After Effects, Compositing, Giveaways, Keying, Matte Painting, Motion Capture, Motion Graphics, Motion Tracking, Showcase, Updates, Visual FX
CORRECTION: @ZLovatt is now our winner! Congrats Zach Lovatt! Our previous winner, decided to unfollow today and just retweet, thus not being qualified to win. Follow us, and you could possibly earn back your chance!
Hey everyone! Thank you all for participating in the first giveaway for Hollywood Camera Work’s Visual FX For Directors! We only had 52 entrants at the time of this drawing, but next Monday and the Monday after that we will be drawing another name to win the last two sets we have!
- Winner: http://tinyurl.com/obyod3
- AE Fire Contest: http://tinyurl.com/puplyu
- HWC VFX For Directors Info: http://tinyurl.com/vfx4directors
- Rules To Enter Contest and Giveaway: http://tinyurl.com/vfx4directorsrules
- @toe_fur LINK: http://tinyurl.com/dka58h
- @VisualFXtuts LINK: http://tinyurl.com/dardcu
- @VFXforDirectors LINK: http://tinyurl.com/po8dew
Huge Tutorial Roundup!
by TopherW on May.30, 2009, under 3D, 3DS Max, AEtuts.com, After Effects, Blender, Cinema4D, Compositing, Contests, GreyScaleGorilla.com, Imagineer Systems, Keying, Maya, Motion Graphics, Motion Tracking, Motionworks, Mudbox, Presets, Project Files, Red Giant Plugins, Trapcode, Typography, Updates, Visual FX, XSI, videocopilot.net
 Okay! So if you enjoyed my VLOG the other day with the giveaway, you will be stoked to know that I am gonna be making them much more regular. There is another up right now on the YOUTUBE and also you can check out my new article on AETUTS+. LINK HERE
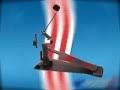 From CarlWH123 on Youtube – Modelling an Axis bass drum pedal in 3DS Max. LINK HERE
 Damien Mathe – I presume that maybe someone already did this, but I recorded a tutorial explaining how to reproduce the soft shadows as seen in Andrew’s tutorial, but in Cinema4D. Of course I only translated the tutorial to C4D, all the credits go to the great Andrew Kramer. LINK HERE
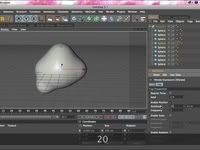 Damien Mathe – This video explains how to make a “blob” effect with Cinema 4D. This was recorded as an answer to a post on Videocopilot.net forums. LINK HERE
 Create Whispy Spirit-like Text by Adam Everett Miller – Adam keeps digging through the good ol’ built in CC plugins and continues to come up with very clever and visually awesome solutions. In this tutorial Adam uses CC Smear as the basis to create text that appears in as if a spirit whisped into it. LINK HERE
 In this tutorial, Nick go though the process of lighting a scene with the Daylight CS Tool for Cinema 4D.
Download the scene files at his blog: Greyscalegorilla.com/blog/2009/05/28/cinema-4d-cs-tools-daylight/
LINK HERE
 After Effects has a bug fix and huge update out this week:
 In this tutorial I explain how to use my free After Effects script MochaImport which simplifies the usage of MochaAE with After Effects. FREE DOWNLOAD of the script: aextensions.blogspot.com
Tutorial LINK HERE
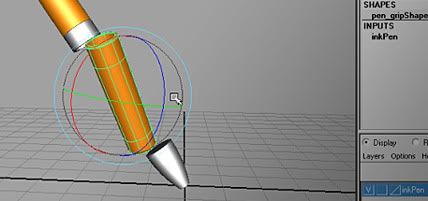 In this lesson we will learn how to change the rotation axis of an object in Maya 2008+
LINK HERE
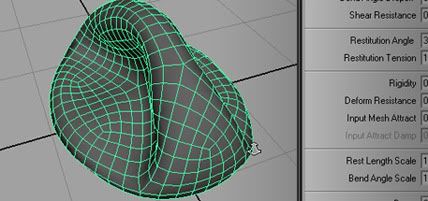 In this lesson we will learn how to create a sphere that works well in dynamic simulations. Uses Maya 2008+
LINK HERE
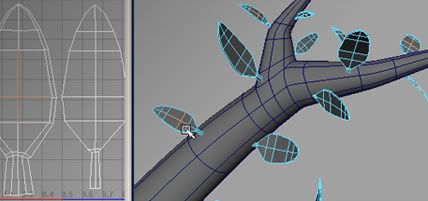 In this tutorial we will learn how to use the UV Texture Editor as a modeling tool in Maya 8+.
LINK HERE
 In this lesson we will learn how the Trimming tool can be used to punch holes into NURBS meshes in XSI 4.2+.
LINK HERE
 In this lesson we will learn where XSI’s shelf is located and how to add commands to it.
LINK HERE
![]() Noise Junkies- After Effects Abstract Color Transfiguration
Noise Junkies- After Effects Abstract Color Transfiguration
Learn a very simple method to make footage into an abstract scene. Use some common plugins to create a “melting-type” animation. LINK HERE
 Mystery Text in Adobe After Effects- Learn how to create this mystery text effect by animating layer styles on a text layer in After Effects. LINK HERE
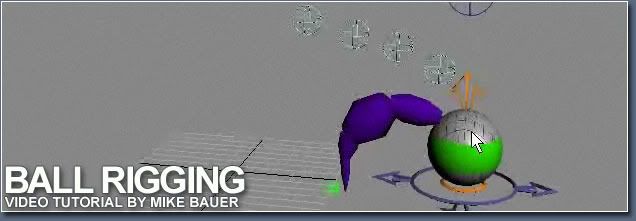 Mike Bauer shows us how to create a simple rig to explore the complexity of animating a ball in our latest 3dsmax video tutorial
LINK HERE
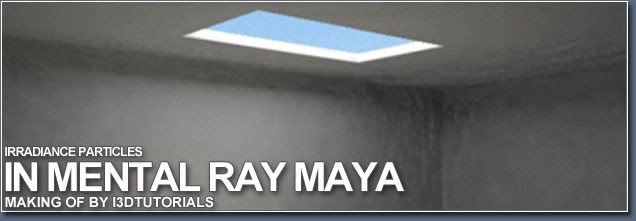 ‘Irradiance Particles in Mental Ray and Hypershade for Maya 2009′ are the latest set of video tutorial by i3D Tutorials. LINK HERE
 *NEW* Cityscape Pt. 1 – Building True 3D objects -Learn how to make a 3D cityscape out of true 3D objects that you can arrange and then fly around with a 3D camera. Techniques featured are: Replicators, 3D cameras, shape tool.
 Solar Ring Motion Video Tutorial Part One LINK HERE

Volumetrix Light 3d Motion Tutorial LINK HERE
 News at 8 Motion Tutorial LINK HERE
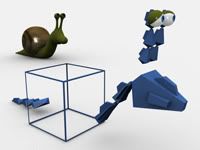 Moving onto the next phase, we give this critter some bones for animation… You will learn how to build a custom rig using bones and dummy objects… We also create some easy to use Eye Controls with simple constraints to help give our guy that all important emotion… LINK HERE
 In part two of this series we’ll look at how to shatter the polygon object using Cinema 4D Explosion FX, add a glass material and image map to the face of the glass, and use an HDR image with the Sky object to create reflections.
Download Materials Watch LINK HERE
NEW 5 SECOND PROJECT!
 This time, it’s all about constructive criticism. The theme for the week is “Something Good, Something Bad.” Submit a short project based on the theme. Then for the project you must comment on ATLEAST three other videos in the “Something Good, Something Bad.” Vimeo Channel. In the comments, say one thing that you like about their entry and one thing that could be better. Something Good and Something Bad.
After watching a piece, people have a tendency to say “Nice Work” (guilty) or “Wow, you animated that?” And, while it can be nice to hear encouraging words all day, it doesn’t do much to push you forward into better design and animation skills. Use these constructive comments to make your work better and better every time. Hopefully constructive criticism will continue though these Five Second Projects.
What is constructive criticism?
DON’T say “That Sucks.”
DO say “Great colors! The animation towards the end gets a little too fast. Try slowing it down.” Keep in mind, criticism can include ideas on how to make the piece better, not to insult their work. With that said, don’t be afraid to state your true opinion. Pulling punches isn’t helping.
What Are Five Second Projects?
We all want to make cool shit for our reel right? Sometimes you just need a theme to get you started. Use the theme “Something Good, Something Bad” to make a five second motion piece and link it in the comments of this blog post. “Shout Box” submissions will not be found and will not be added to the channel. Please be sure to post a link in this post’s comments to ensure Nick seeing it.
It’s really great to see so much participation. Tell a friend about the five second projects and get them involved too. Don’t forget to push yourself to try something new every week. What about a new piece of software or technique you have wanted to try?
DONT FORGET TO GIVE CONSTRUCTIVE CRITICISM!
Visual Effects for Directors Review and Giveaway!
by TopherW on May.27, 2009, under 3D, 3DS Max, After Effects, Cinema4D, Compositing, Contests, Giveaways, Keying, Matte Painting, Maya, Motion Capture, Motion Graphics, Motion Tracking, NUKE, Photoshop, Reviews, Showcase, Smoke, Updates, Visual FX, XSI
Make sure you visit our Contests Page for the official rules on how to enter this contest and the requirements. Please subscribe to our Youtube Channel as well! Not totally a requirement to enter the contest, more of a kindness… Thank you all!
Check out the trailer for Visual Effects for Directors over at their official site…
HollywoodCameraWork.us
Happy Memorial Day! Video Copilot Coupon Code!
by Topher on May.25, 2009, under 3D, 3DS Max, AEtuts.com, After Effects, Blender, Cinema4D, Compositing, Form, Horizon, Imagineer Systems, Matte Painting, Maya, Motion Graphics, Motion Tracking, Motionworks, Particular, Photoshop, Presets, Project Files, Red Giant Plugins, Shine, Starglow, Trapcode, Typography, Visual FX, Vue, XSI, artbeats, videocopilot.net
 If you guys didn’t see yet… I have officially taken over The Hive Blog for VideoHive. I have three articles over there so make sure that you check em out!
LINK HERE
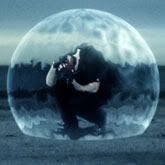 In other news my article “La Grande After Effects Tutorial Roundup From Elsewhere” is at AEtuts+. Make sure you check it out!
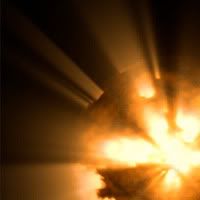 Learn How to Create a Light Rays Custom Effect from Scratch by Jorrit Schulte – A custom effect is special kind of preset that looks and behaves like a plugin. It allows you to save a special recipe of plugins and keyframes into something that you can reuse with ease. Jorrit Schulte has been producing a bunch of these very useful custom effects and providing them for free at http://aenhancers.com. In this tutorial he breaks down how to create the incredibly popular light rays effect and how to package it all into a custom effect. LINK HERE
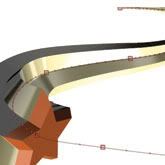 Maltaannon has a cool video exploring the features of Zaxwerks new product SERPENTINE
LINK HERE
 Forging Fire Studios has a new tutorial called “Swallowed By Light”. Takes a lens flare and it kind of swallowed a text layer. Looks similar to a TV turning on or off.
LINK HERE
 Trish and Chris Meyer’s new book After Effects Apprentice has ANOTHER free tutorail… a Gentle Introduction To Expressions for you to check out.
LINK HERE
 Dean Velez’s Motion Graphics Lab has a Writing With Water tutorial. Simulating a write on effect with water flying everywhere.
LINK HERE
 Red Giant TV Episode 19 is from Eran Stern of SternFX.com. Taking the inspiration from the new Star Trek movie, he teaches you how to create the transporter effect.
LINK HERE
 Carl Larsen has a killer tutorial over at Toolfarm on replacing the horizon on a shot to use with Matte Paintings or stuff like that using Mocha.
LINK HERE
 One more from our buddy Carl Larsen… the second half of the Tracking a Child Series over at the CreateCow.net AE Podcast.
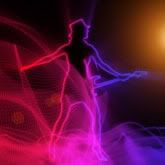 Aharon has a tutorial that I missed a couple weeks back… It was a follow up to Better Compositing with LightWraps… very cool stuff.
LINK HERE
 FINALLY Harry has a new tutorial up… and its pretty freakin awesome. Reverse Shatter Effect In AE, heavily reliant on Expressions and uses some Adobe Illustrator.
LINK HERE
 Video Copilot – Ancient Titles
Very cool tutorial showing an alternate way to make a real looking drop shadown, and make particles only appear where light “would actually” be in your scene. LINK HERE
 Video Copilot – Soft Shadows 3ds Max
check out how to create soft shadows using a specific light array, as well as animate letters individually for a cool looking animation. Also VCP is having a sale on their products… 20% off this Monday, coupon: HOLIDAY. LINK HERE
 In this 3 tutorial series we’ll look at how to build a glass shatter effect using Illustrator, After Effects and Cinema 4D. This section includes capturing the template in After Effects, creating paths in Illustrator and setting up imported splines as polygons in Cinema 4D. LINK HERE
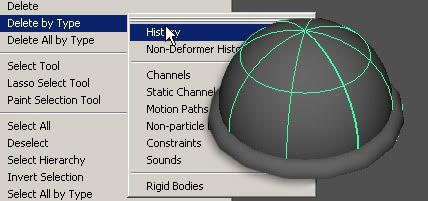 In this lesson we will learn how to use Maya 8+’s History to create an interesting effect.
LINK HERE
 In this lesson we will learn how to transfer a UV set between two polygon objects that do not have the same number of points in Maya 8.5+ LINK HERE
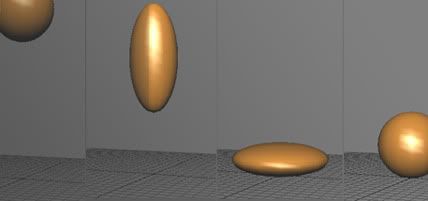 In this lesson we will learn how to spice up a boring animation with squash and stretch in XSI 5+. LINK HERE
 In this lesson we will learn how to use lofting to create a NURBS mesh in XSI 4.2+. LINK HERE

Creating a Teddy Bear in Blender Part 2
 Working with Curves in Blender
 Go over different shadow options and create some creative renders. A quick method to adapt the “Soft Shadows” concept introduced by Andrew Kramer…but in Cinema 4d. LINK HERE
 Leather is one of the most used materials in the field of Furniture design. Especially for design of sofas or couches. It is quite easy to obtain a good leather material. LINK HERE
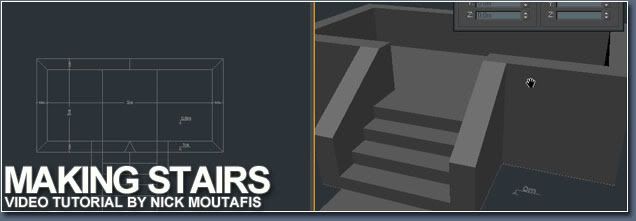 This is an automated method that I discovered on how to create stairs. The technique can be used in any software. I hope it helps! LINK HERE
 In this tutorial you will learn some of the basic concepts behind animating on a computer. These principals can be applied regardless of the software package you prefer. LINK HERE
 @ PVC – Over on Artbeats.com, we’re starting a trio of articles on the use of color: basic color theory, ideas for how to select a workable color palette, and techniques for remembering and easily applying your chosen colors throughout a project. This month is the article on basic color theory, including some basics on picking colors including combinations that do or don’t work for text. LINK HERE
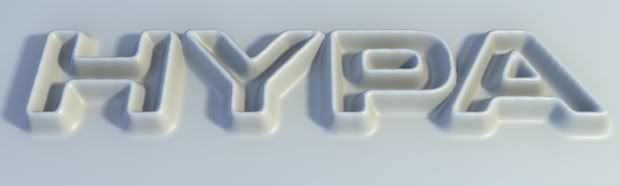
Ever used the caching that is available in certain tags and objects for Cinema4D? Here is an introduction to the Point Cache Tag and Point Cache Deformer. For this tutorial I thought I’d record a short movie. LINK HERE
 Looking on “Crashing Meteor” tutorial in Vue 7- Understending how it’s working, Advanced function editor, Adjusting settings…. LINK HERE
Also check out the Lighting Tutorials: Underwater & Make It Glow
1 comment:
Thanks for your nice blog.
Post a Comment